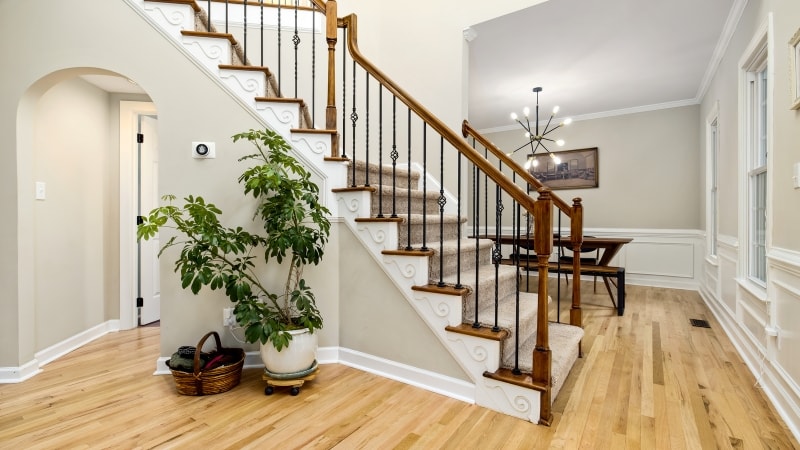
The staircase in any home is often more than just a functional element; it’s a grand architectural feature, a focal point that connects different levels and serves as a visual anchor.
Yet, its lighting is frequently an afterthought. Selecting the right staircase chandelier is as much an art as a science, with scale, style, and lighting all needing to work together in harmony.
Most homeowners spend vast amounts of time and money on lighting throughout their living rooms, kitchens, and bedrooms; they neglect the fact that an expertly selected light fitting can make a world of difference to a staircase.
The following are the reasons why special attention should be given to staircase lighting.
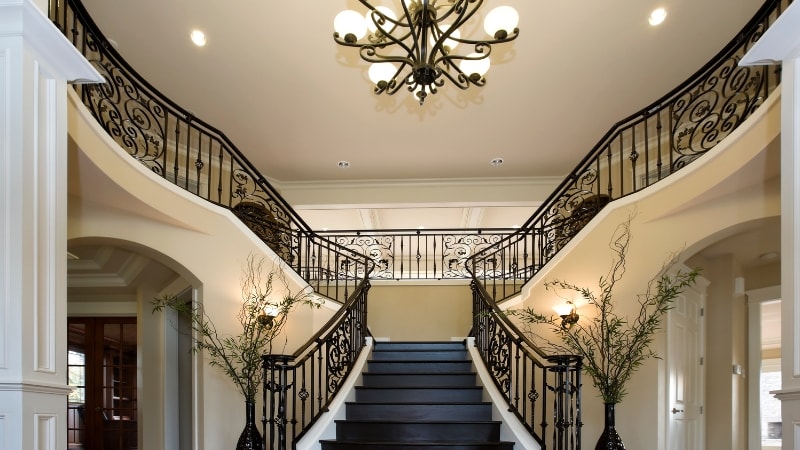
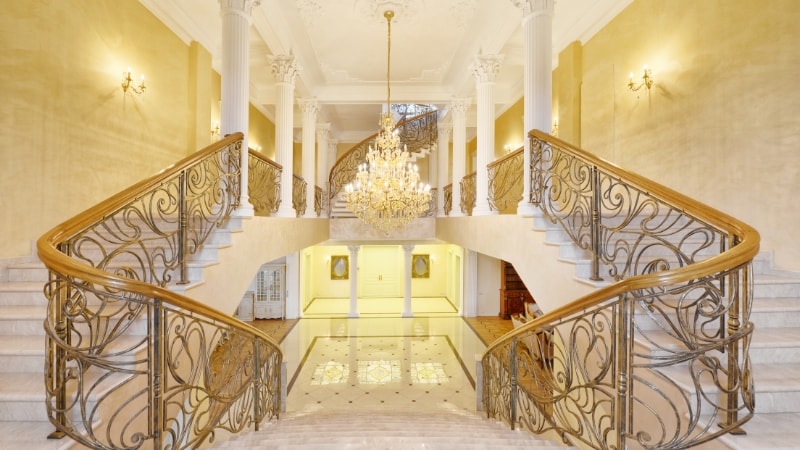
The staircase and the foyer are some of the areas that guests visit first. An impressive chandelier is a sure statement that wows your guests, making the first impression of the rest of your home design.
A staircase chandelier may bring out the architectural lines, a great balustrade, or a high ceiling to bring out the beauty that is there inherently.
In addition to the beauty, good architectural lighting is essential for safety. A bright staircase is safety-conscious in that it provides steps and landings with light, particularly in buildings with children or seniors.
Research in the Sage Journal has demonstrated that proper lighting plays a fundamental role in enhancing visual performance and greatly minimizes the chances of falls and injuries, particularly at night.
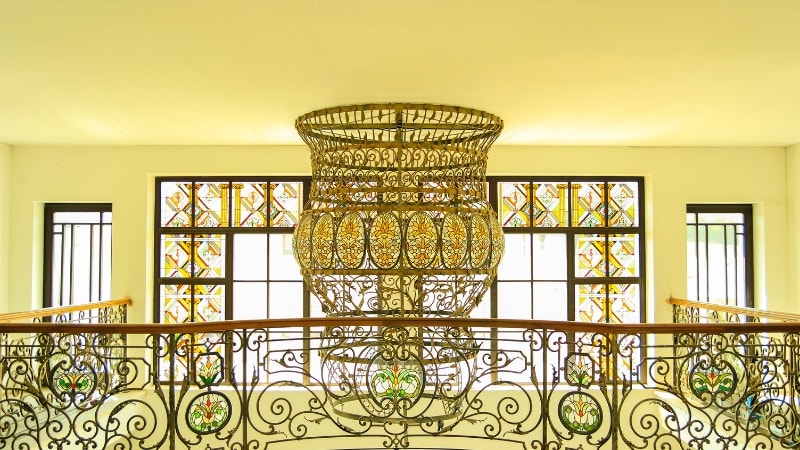
The ambience of a room depends on the lighting. A gentle, warm light turns a large staircase into a friendly place. It can be made spectacular by bright, dramatic light that can render it majestic.
According to the Lighting Research Centre, the quality and color temperature of warm or cool light can significantly affect mood and the sense of space.
Better design, such as custom lighting in areas, such as stairways, adds to the overall attractiveness of a dwelling’s decor and can significantly contribute to its resale value.
A National Association of Home Builders (NAHB) report shows exterior lighting as among the most desired features, as 87% of first-time home buyers say exterior lighting is desirable or a must-have.
Although this is more specifically related to the exterior, the rule also applies to dramatic interior elements, such as an impressive home staircase and a chandelier, which are indicators of a well-decorated and renovated house.

Sizing is the most critical aspect of choosing a chandelier size for your staircase. An improperly sized fixture can throw off the entire balance of your space. Here’s how to approach it systematically.
The height of the chandelier is extremely significant in terms of interior design lighting. It should not hinder Eastern or Western views, and should be neither too low nor inclined. Neither should it appear small in a high area.
Take a measurement from your floor to the ceiling where the light will be mounted.
The lowest point of the chandelier must be no less than 7 feet (approximately 213 cm) above the topmost landing or step. This helps people to avoid bumping heads
Within a two-story stairwell, the lowest point of the light is approximated at the halfway mark of the second floor. Or, it must be 7 feet or more above the first floor. By doing so, you will be able to have a good view of it from both levels.
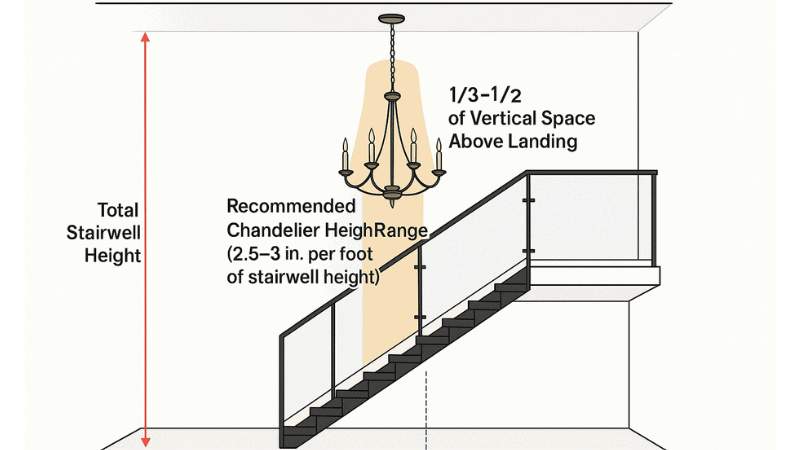
A general rule that applies to the total height of the chandelier in an open stairwell is as follows:
Total Stairwell Height (in feet) x 2.5 to 3 inches per foot = Recommended Chandelier Height (in inches)
Another way is that the maximum of 1/3 to 1/2 of the vertical space between the highest step/landing and the ceiling ought to be occupied by the chandelier.
The diameter represents the extent of the space occupied by the chandelier style and size horizontally.
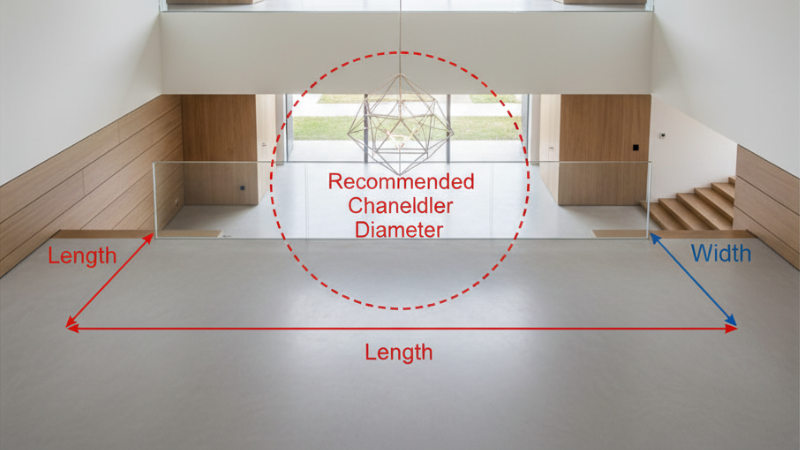
Method 1: Room Dimensions (Applicable to Open Foyers/Landings)
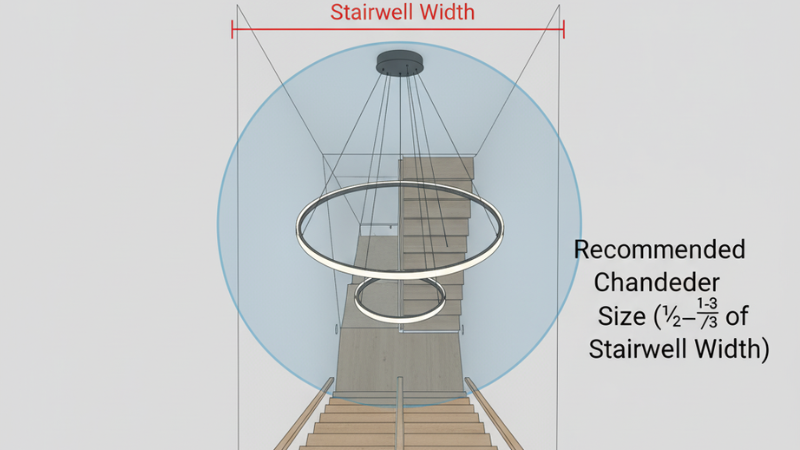
Method 2: Stairwell Width (More Specific for Narrow Stairwells)
The style of a chandelier must be coordinated with the interior of your house. It must also match the design of the staircase.

Modern designs tend to be clean-lined. They adopt geometric designs and novel materials.
There are multiple options, like traditional, modern, and a combination of the two. You have to choose which one works best for your home.
The way a chandelier casts light affects both functionality and ambiance.

| Feature / Type | Chandelier (Multi-Tiered/Large) | Cluster Pendant (Multiple Small Pendants) | Linear/Spiral Chandelier (Long, Sculptural) | Flush Mount/Semi-Flush (Ceiling Hugging) |
|---|---|---|---|---|
| Aesthetic Impact | High, grand statement, focal point | Moderate to High; modern, artistic, versatile | High, dramatic, contemporary, complements verticality | Low to Moderate; subtle, blends in |
| Best For | Large, high-ceilinged foyers, grand staircases | Modern, minimalist, or eclectic spaces, varying ceiling heights | Tall, narrow stairwells, contemporary homes | Low ceilings, tight spaces, secondary stairwells |
| Light Output | Excellent ambient and often some direct light | Variable; depends on the number/type of pendants | Good, often a combination of ambient and direct | Moderate; mainly ambient |
| Maintenance | Can be challenging to clean, bulb replacement | Easier to access individual pendants, can tangle | Can be challenging if very long or intricate | Generally easy |
| Installation | Complex due to size/weight, often requires professional | Can be tricky to get heights right, individual wiring | Complex, requires secure mounting for length/weight | Relatively straightforward |
| Cost | High | Moderate to High (depending on number/quality) | High | Low to Moderate |
Hanging a staircase light or chandelier requires some thoughtful considerations:

The selection of a staircase chandelier is a revolutionary design option that has effects on the aspect of aesthetics as well as the functionality of the central artery of your house.
Through highly thoughtful planning in regard to the size of your space, the style of your home, and the feasibility of installation and lighting capacity, you can choose a fixture that will not only surround your stairwell with light, but also your living environment altogether.
Contact well-known and specialized lighting provider Risuncorp and find the best chandelier lighting for your home today. A proper chandelier is not only a source of light but can be considered a decoration itself, true art, and one of the keys to creating the most exquisite atmosphere at home.
Contact us now and let us illuminate your home and impress your guests.
Q1. What size chandelier is best for a two-story staircase?
A two-story stairway needs a major chandelier that is 7 feet or higher off the first floor and extends up the passage of the stairs. It helps create an impact on the second floor and diameter with respect to the width of a stairwell and the overall size of the foyer.
Q2. Can I hang a chandelier in a narrow stairwell?
Yes, narrow stairwells, choose linear or cascading or very narrow column-type chandeliers, and preferably the diameter is much smaller than the width of the stairwell.
Q3. How low should a chandelier hang in a staircase?
The closest height from the top of the highest step or landing to the lowest point of a staircase chandelier is 7 feet (213 cm) to ensure safety and proper clearance.
Q4. Can I install a dimmer switch for stairwell lights?
Yes, it is very advisable to use a dimmer switch on stairwell lights, therefore taking control of the ambiance, as well as conservation of energy.
Q5. What’s the difference between pendant and chandelier lights for stairs?
The pendant light is simply a single light suspended by a cord or rod. Whereas the chandelier has multiple branches and more often than not, more decorative with light sources, often larger and more decorative than a single pendant light.
A chandelier in a dining room serves not only as a source of light. It is a showstopper. It creates an atmosphere over meals and get-togethers. You need to set it at the right height.
The correct position of a chandelier improves the atmosphere. It also offers the best lighting.
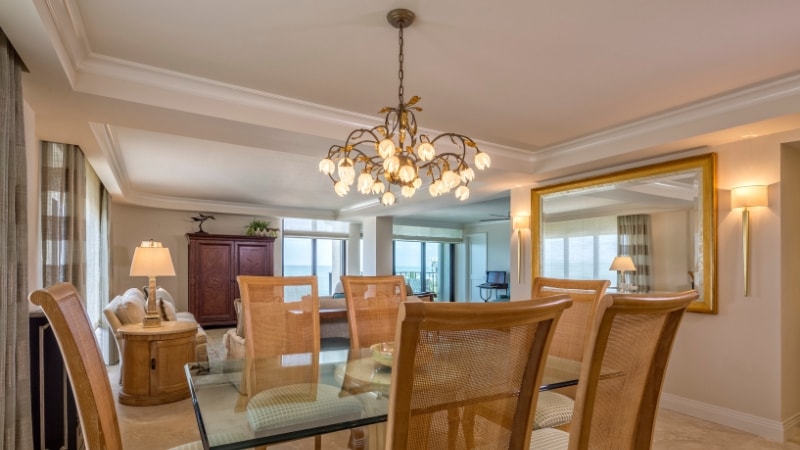
The height of your chandelier is a crucial factor that determines its utility and aesthetic appeal. When it is too high, it may appear to be lost in the room. It may not give the table sufficient direct light. This may cause the dining room to become impersonal.
Effective interior lighting design transforms how people experience a space, from layering light to optimizing brightness and contrast.
On the one hand, when it is too low, it can block views across the table. This produces an uncomfortable and visually busy area.
The aim is to provide balance. Your dining table should be complemented by the chandelier. It is supposed to give sufficient light that does not obstruct.
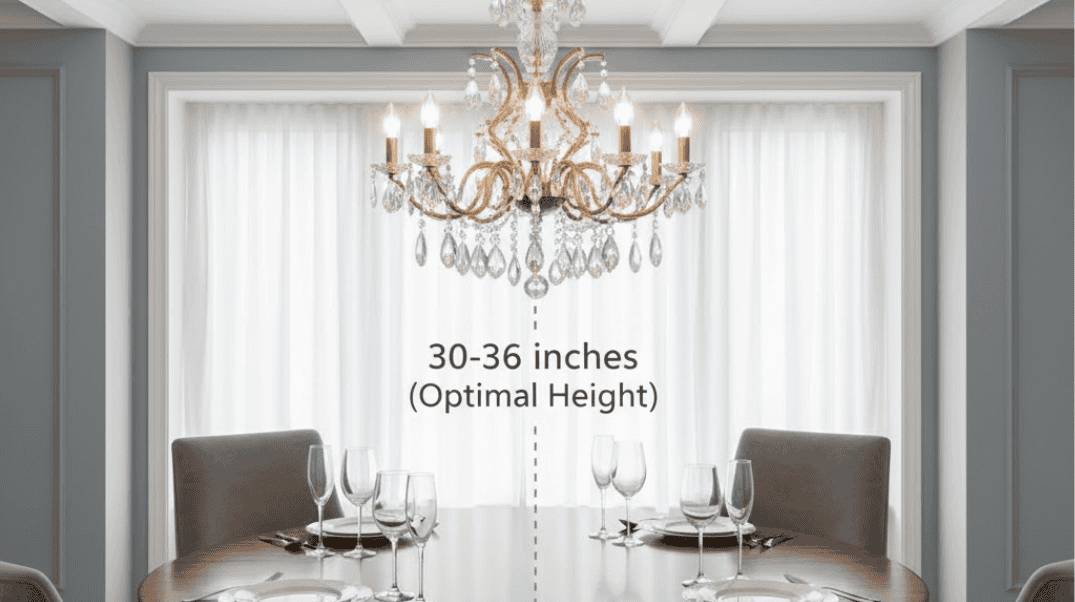
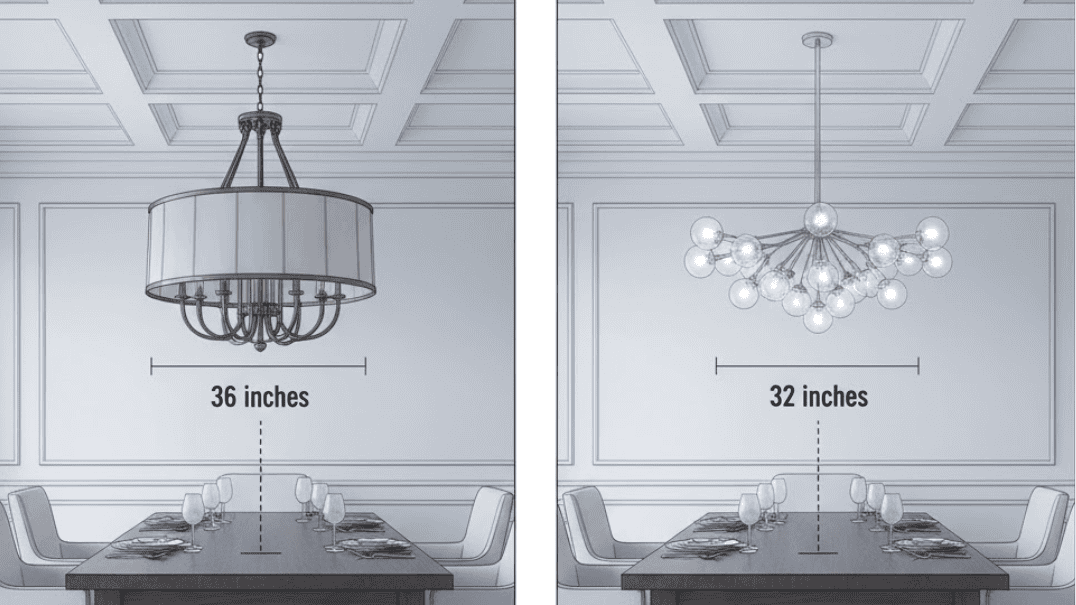
One very common rule applies when it comes to hanging the dining room chandeliers. The minimum height of the chandelier must be 30 or 36 inches above the top of the dining table.
According to the Environmental Psychology Journal, the placement of a chandelier in your space influences interaction, whether social or within the home.
This is a rule that applies to rooms that have the normal 8-foot ceilings. This degree of elevation provides good visibility. It also makes sure that it lights up the table properly.
This is a wonderful rule to start with. Nonetheless, it must be modified according to ceiling heights. To calculate the hanging height, add 3 inches to the specified height of the ceiling for each foot of ceiling height exceeding 8 feet.
Here is a simple formula:
Base Height(30−36 inches)+[(Ceiling Height in Feet−8)×3 inches]
Let’s look at a lookup table for quick reference:
| Ceiling Height | Chandelier Bottom Above Table |
|---|---|
| 8 feet | 30-36 inches |
| 9 feet | 33-39 inches |
| 10 feet | 36-42 inches |
| 12 feet | 42-48 inches |
Chandeliers can be a do-it-yourself project. However, it has to be done carefully and securely. In case you are not confident, engage a professional electrician.

Find the electrical breaker that operates the dining room light. Turn off the switch. To make sure the power is off at the light, use a voltage tester. This is a vital step. Do not ever work on live electrical wires. Consider the electrical safety codes and standards when installing electrical equipment.
Carefully unscrew the old enclosed light fixture or chandelier. Unscrew or undo any screws or nuts attaching it to the ceiling box. Lower the fixture gently.
Unplug the wires (typically black, white, and a bare copper ground wire). See how they were connected. This will assist you in the installation of the new one.
The weight of the new chandelier should be supported on the ceiling electrical box. Standard electrical boxes typically do not have test ratings exceeding the weight of a light fixture, which is generally 50 pounds.
If your new chandelier is heavier than this, you must replace the regular box. Install a fan-rated heavy-duty box.
This is where you need your height calculations. The majority of chandeliers are supplied with a chain or an arrangement of rods.
Get the height of the chandelier to the floor by measuring. Find your calculated height (e.g., 30-36 inches above the table).
Measure the height of the chandelier and deduct it from your preferred hanging height. Then this will tell you how long a chain or rod you require. Do not forget the hanging loop and the canopy.
Your new chandelier will come with instructions on how to put it together. This usually includes mounted arms, ornamental effects, or beads. You can do it on a flat, clean surface. This avoids scratches or breakages. Make sure that you have all the necessary tools.
Make sure that the wires of the chandelier are connected to the wires in the ceiling box.
Attach the connections using wire nuts. Make sure that they are fastened well. Then, carefully insert the prolonged wiring into the ceiling box.
Hold the chandelier and hook it on the ceiling box with the help of a wire. This may include inserting a nipple through the mounting strap. Then fasten it with a cap nut. Or it may consist of screwing the canopy directly onto the box.
Ensure that the fixture is thoroughly fastened. It is not supposed to vibrate. Move the canopy up to conceal the wiring as well as the ceiling box. Fix it firmly.
Install the proper light fixtures or bulbs with screws. Restore the supply at the power breaker. Put your new chandelier to the test. Test that it shines well. Adjust the height to make the last adjustments.
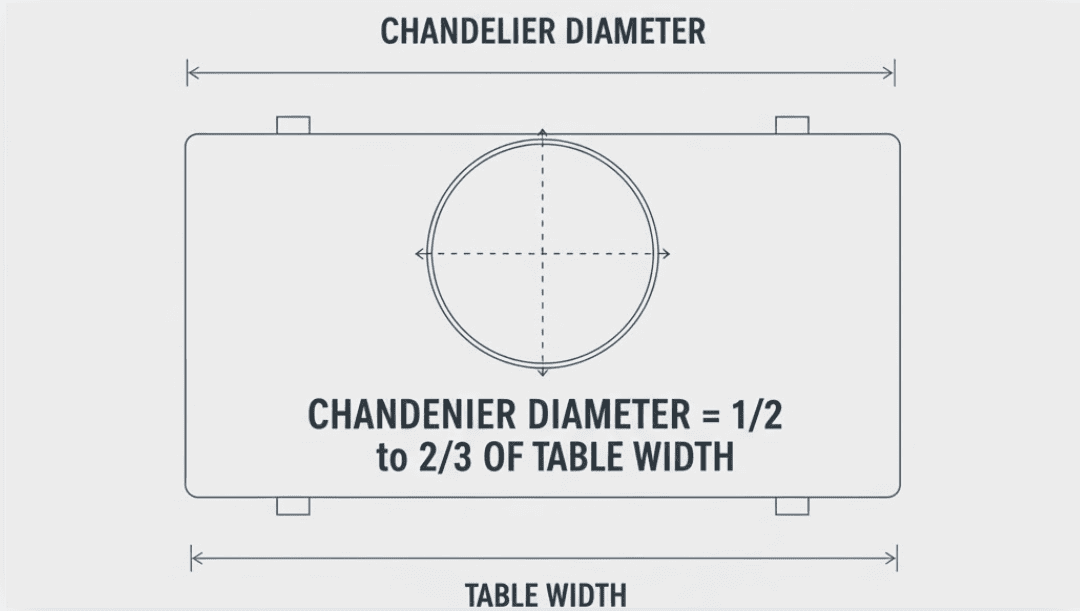
Dining room chandelier selection and placement also depend on the size and shape of your dining table. The diameter of the chandelier is usually from half to two-thirds of the width of your dining table. This ratio makes the chandelier more visible. It does not make it appear too small or too big to fill the table.

Make sure that the spacing between them is equal. All the fixtures must be placed in the middle over the corresponding part of the table.
Even small details like the style of your chandelier can affect its optimum hanging height. This involves light and the balance of visual weight.
According to the lighting trends guide provided by Architectural Digest, more minimalist chandeliers are becoming more frequent as modern elements, likely to be lower in height, whereas ornate ones require more clearance to not overtake the room.
Heavy/dark chandeliers, such as the ones with large drums or heavy shades, usually require some additional height. This does not make them too hefty or overwhelming.
It also enables the distribution of their light to be more efficient. They will not obscure sightlines as much.
Indoor lighting Fixtures that are minimalist or transparent often have a slightly lower position. These features include crystal chandeliers or plain globe pendants. They are less liable to bar the views since they have an open design. Even at one inch shorter, they will still be elegant.
Common pitfalls can be avoided to make the chandelier installation successful.
Installing a dining room chandelier at the right distance changes your space. It is a compromise between the aesthetic and the functional. Using the general rules and making renovations if suitable for your room, you will obtain a really welcoming environment.
Think of your ceiling height, table size, and design of your chandelier. Measure with care. Maintain a safe and proper installation process. Then, your dining room will become the place where everything comes together: light, comfort, and style.
Explore our wide range of chandeliers and find the perfect one to suit your room’s aesthetic. We have a selection of on-trend chandeliers at Risuncorp to suit every room’s taste.
Contact us now, and you can get our product catalogue. We will reply to you as soon as possible to meet your needs. Let’s work hard together for the lighting industry.
Q1. What should be the height of the chandelier over the dining table?
An 8-foot ceiling requires the bottom of a chandelier to be 30-36 inches above a dining table and 3 inches per additional foot of ceiling height.
Q2. What size chandelier should I get for a dining table??
A chandelier must have a diameter between 1/2 and 2/3 the width of your dining table.
Q3. Should the chandelier be centered over the table or the room?
The dining table should be in the center of the room, not the center of the room, and the chandelier should be above the dining table.
Q4. Can I install a chandelier myself?
Well, yes, but only when you are comfortable working with electricity; otherwise, it is always better to employ a professional electrician to ensure your safety.
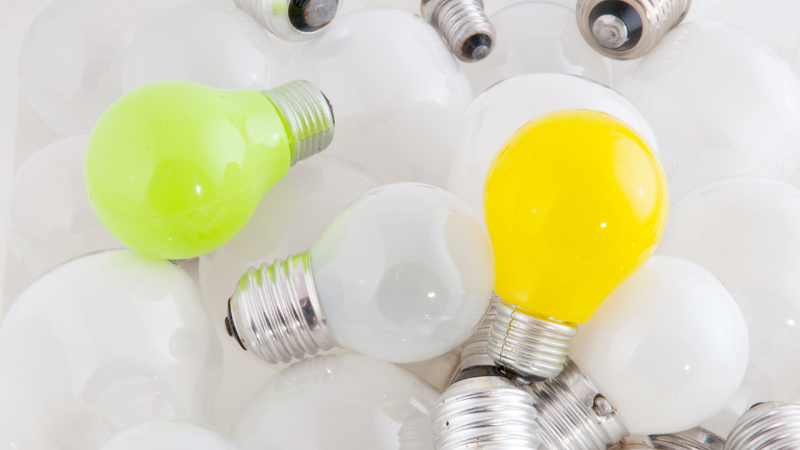
Ever wondered how to dispose of broken light bulbs? The majority of people just dispose of their burned-out bulbs in the trash, which is not even an environmentally friendly option.
There are various types of light bulbs, and it is necessary to learn about all types to be able to deal with them responsibly. Let’s take a look at all the essential information in this guide below.

Light bulb disposal is not a one-size-fits-all approach due to different disposal methods for different types of bulbs. Disposing of light bulbs the right way is important both in terms of environmental and safety concerns.
When light bulbs are not disposed of properly, they can release toxic elements.
When these light bulbs break, they emit mercury and other harmful substances that may become a health hazard.
Fluorescent Tube: The fluorescent lighting is a durable and power-saving light, which provides a bright, cool light.
Incandescent Bulbs: The incandescent bulb represents an older technology of warm, yellowish light that is infamously inefficient.
Compact Fluorescent Lamps (CFLs): Compact Fluorescent Lamps are more energy efficient than incandescent bulbs, yet they contain a small amount of mercury.
LED Bulbs: LED bulbs are very energy-saving, and they are specifically designed to substitute incandescent bulbs because of their prolonged life expectancy.
Halogen Bulbs: A halogen bulb is a variation of an incandescent bulb that has halogen gas. This gas contributes to lengthening the bulb’s life.
Here’s a quick-reference table for light bulb disposal by type:
| Bulb Type | Disposal Method | Notes |
|---|---|---|
| Incandescent | Trash (normal household waste) | Not recyclable; wrap in paper to prevent glass shards. |
| Halogen | Trash (normal household waste) | Similar to incandescent; check local rules if unsure. |
| Compact Fluorescent (CFL) | Recycle (hazardous waste/e-waste facilities) Do not trash! | Contains mercury—requires special handling. Many retailers offer take-back programs. |
| Fluorescent Tube | Recycle (hazardous waste/e-waste facilities) Do not trash! | Also contains mercury; check with local recycling centers. |
| LED | Recycle (e-waste programs). Some allow trash disposal (check locally) | Non-toxic but recyclable for materials recovery. |
Light bulbs must be disposed of properly, depending on the type of light bulb; some are disposable, and others must be recycled specifically because of the toxic substances, such as mercury. The step-by-step guide to disposing of different bulbs is as follows:
Fluorescent tube lights cannot be thrown in the garbage bin since they are filled with mercury, which is a toxic material. You may dispose of them via specialized services, such as recycling centers. When you take them to a recycling center, be sure to pack them carefully in newspaper to avoid breaking.
CFLs have a small amount of mercury and, therefore, should be disposed of in an appropriate manner. You cannot put them in your ordinary garbage, as they may emit mercury into the environment. One should make sure to bring them to a recycling center that handles hazardous waste.

LED light bulbs contain no mercury; they have microchips that might have some traces of metals such as arsenic and lead. These bulbs can be discarded in the trash, but it will not be very convenient for the environment.
You are advised to contact your local recycling program about the possibilities of LED recycling in your area.
Incandescent bulbs can be disposed of easily in the ordinary trash. You must, however, take caution to ensure that the broken bulb is well enclosed in a plastic bag to prevent injury.
They can also be recycled, provided that the bulbs are in good condition. You may make them into mini lamps, small vases, or Christmas ornaments.
It is okay to dispose of halogen bulbs in the trash since they do not have mercury. These bulbs have gas, which is why they are not supposed to be recycled. Always remember to wrap the broken bulbs in the newspaper before throwing them in your ordinary dustbin.

In case a fluorescent or CFL light bulb breaks, follow the cleanup process recommended by the EPA. Otherwise, you can follow these steps if a light bulb breaks:

With LED tube lights or HID bulbs, or a lot of them, a local household hazardous waste (HHW) facility or e-waste recycling center is your best bet. Where no local recycling is available for CFLs or fluorescents (which contain mercury), look for HHW collection events in your area.
LED lights are non-toxic, but preferably should also go to e-waste recyclers; in some localities, they can be put in the trash when no other option exists. Always check with the local authorities to confirm the disposal regulations to ensure environmentally friendly and compliant recycling.

Disposing of light bulbs may be legal or not, depending on the type and the place. Regular incandescent and halogen lamps are generally okay in normal trash, although wrapping them up avoids the danger of glass.
CFLs and fluorescent tubes, however, contain mercury and are therefore illegal to dispose of in trash in many localities, such as California, the EU, and some parts of Canada—they should be recycled at special facilities.
Although they are not toxic, energy-efficient LEDs are frequently covered under e-waste recycling regulations. EPA has the authority to impose fines in case it finds the lamps in a garbage can or dumpster.
Besides, when you dispose of fluorescent lighting as hazardous waste, it will count towards your total waste under the RCRA regulations.

Proper disposal of light bulbs is a significant step towards environmental responsibility. By knowing about the different types of light bulbs and their disposal methods, you can reduce the risk of hazardous materials.
Moreover, choosing ENERGY STAR-certified bulbs can be a convenient option for efficiency and savings. Be sure to go for long-life LEDs to reduce replacement needs. You can consider eco-conscious manufacturers, such as Risuncorp, to handle your light bulbs.
Ready to upgrade your lighting solutions? We provide bulk supply and customized solutions to help your business cut costs and achieve sustainability targets. Contact our team today to discuss your project needs.
Q1. Is it OK to break a CFL bulb?
If a CFL bulb breaks, it may release a small amount of mercury. The risk is low if cleaned up properly.
Q2. Where can I recycle fluorescent tubes near me?
Contact your local recycling center to ask if they accept light bulbs and what their specific disposal rules are.
Q3. Can Home Depot recycle light bulbs?
Home Depot recycles light bulbs by offering a free recycling program at all of its North American stores.
Q4. Do all light bulbs contain mercury?
Light bulbs such as halogen, incandescent, and LED do not contain mercury.
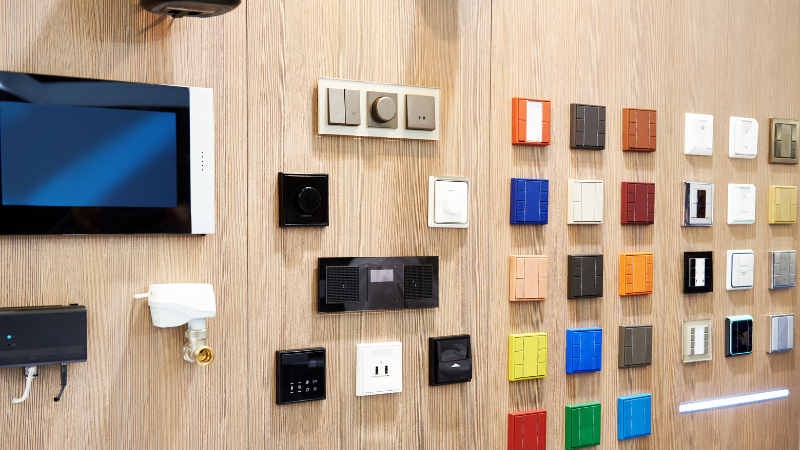
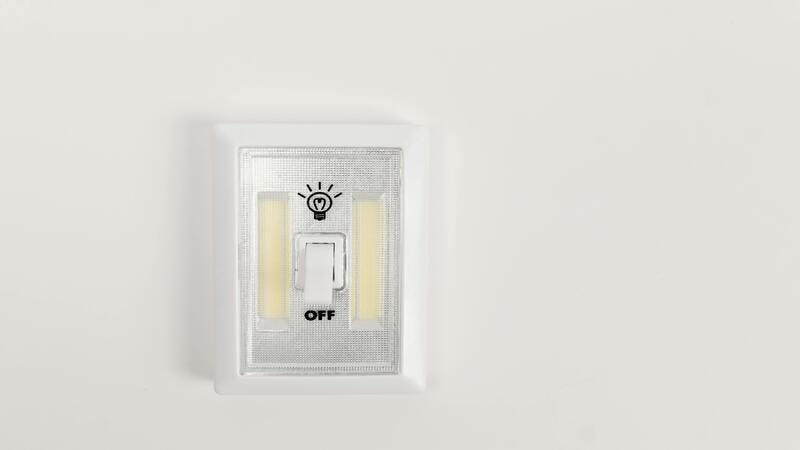
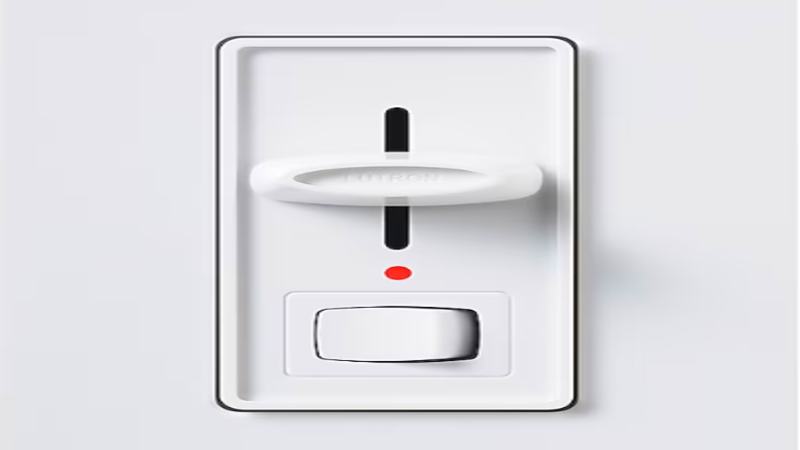
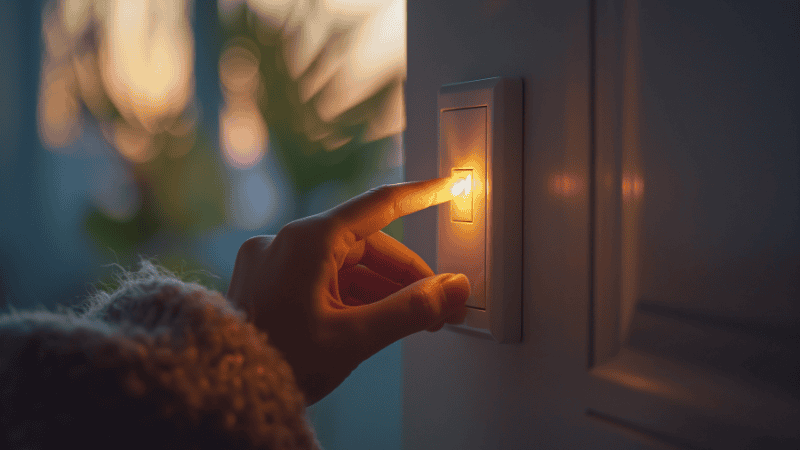
With various types of light switches, traditional, smart, and dimmable, it’s essential to understand each one. This ensures a confident selection for renovation or electrical installation in a home or commercial project.
This simple guide will help you understand all types of light switches. Explain how each works and where and when to use each type.
Light switches are not just on-and-off controls in modern spaces. They are used to enhance the room’s ambience, energy efficiency, and user experience.
Modern switches let users select between different lighting modes. For instance, dimmers are used to control light bulb brightness. Smart switches let you schedule when and how much light is required.
The selection of the right light switch type results in smooth operation and better energy management. It boosts property value, too. A wrong switch leads to incompatibility with light bulbs or fixtures. It results in higher installation costs, energy wastage, and a poor user experience.
So, if you want to create an optimized lighting space, it’s important to understand all electrical switch types and their characteristics.
| number | Switch Type | Appearance / Action | Best For | Smart Option |
|---|---|---|---|---|
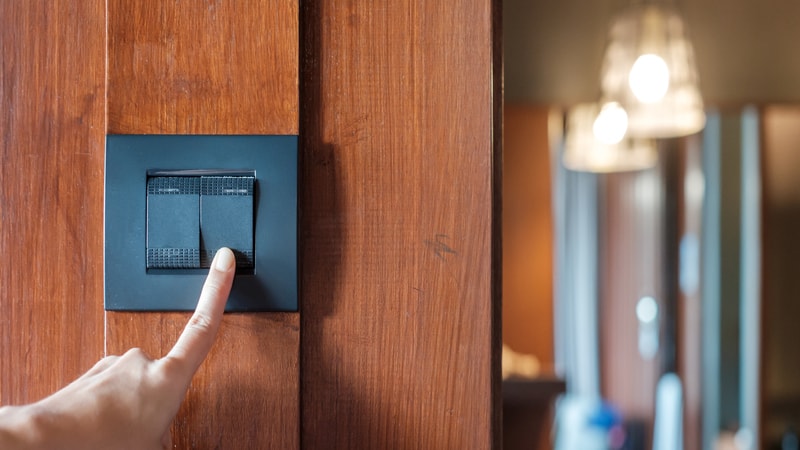
| 1 | Toggle Switch | Up/down lever | Traditional homes | ❌ |
| 2 | Rocker Switch | Flat press | Modern aesthetics | ✅ |
| 3 | Push Button Switch | Push-in on/off | Vintage style or minimal setups | ✅ |
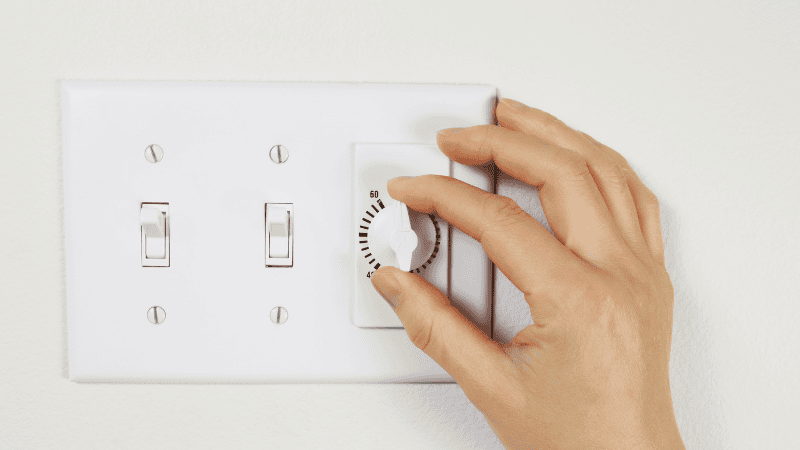
| 4 | Rotary Dimmer Switch | Turnable knob | Dimming incandescent lights | ❌ |
| 5 | Slide Dimmer Switch | Slide control + on/off | Dimmer upgrade to traditional homes | ✅ |
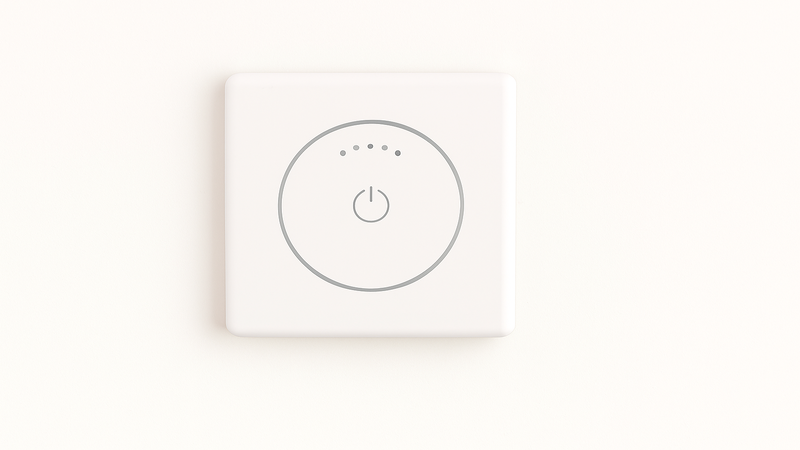
| 6 | Touch Switch | Tap-sensitive surface | High-end, modern interiors | ✅ |
| 7 | Smart Switch | On/off based on the schedule | Home automation systems | ✅ |
| 8 | Wi-Fi / Bluetooth Switch | Wireless phone control | Retrofit for renters | ✅ |
| 9 | Motion Sensor Switch | Auto on/off with movement | Bathrooms, garages | ✅ |
| 10 | Timer Switch | Sound-Activated Switch | Outdoor or energy-saving settings | ✅ |
| 11 | 3-Way / 4-Way Switch | Control from multiple spots | Stairs, hallways | ✅ |
| 12 | Double / Combination Switch | Multiple circuits, 1 plate | Compact wall setups | ✅ |
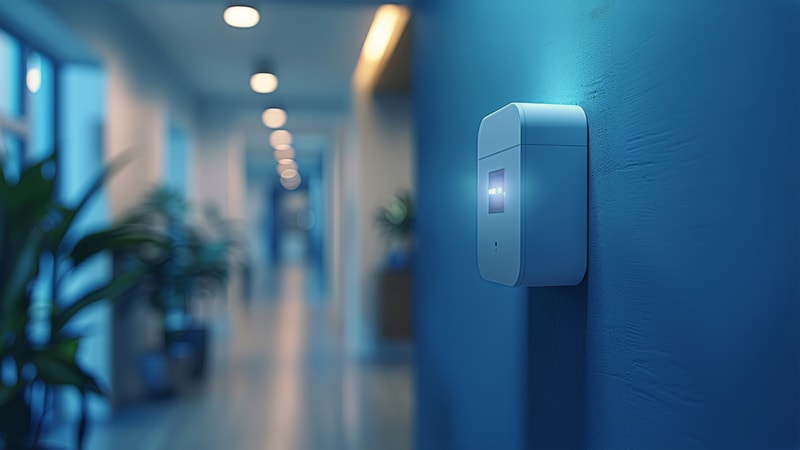
| 13 | Key Card Switch | Hotel power management | Hospitality/commercial use | ✅ |
| 14 | Pull Chain Switch | Chain-controlled switch | Ceiling lights, lamps | ❌ |
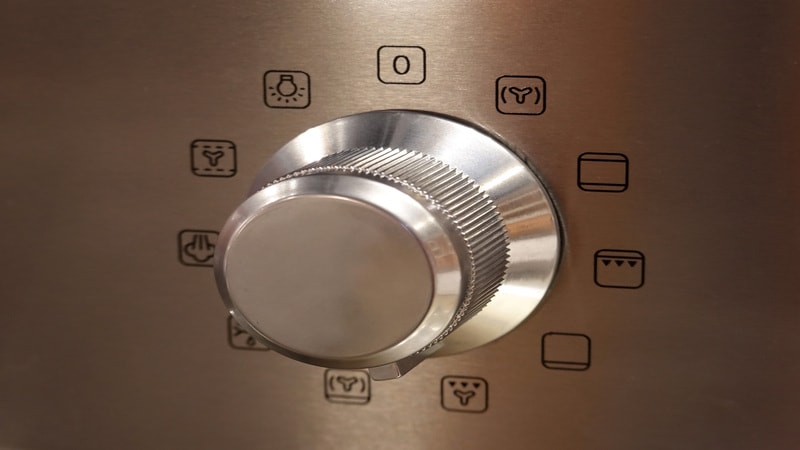
| 15 | Selector Switch | Rotating knob with positions | Machinery, appliances | ❌ |
| 16 | Illuminated Switch | Built-in light indicator | Night visibility | ✅ |
| 17 | Sound-Activated Switch | Claps or voice triggers | Novelty use, accessibility | ✅ |
| 18 | Remote Control Switch | Remote-operated on/off | Bedside use, smart homes | ✅ |
| 19 | Proximity Switch | No contact needed | Cleanrooms, hospitals | ✅ |
| 20 | Magnetic Switch | Magnetic field activation | Security, industrial automation | ❌ |
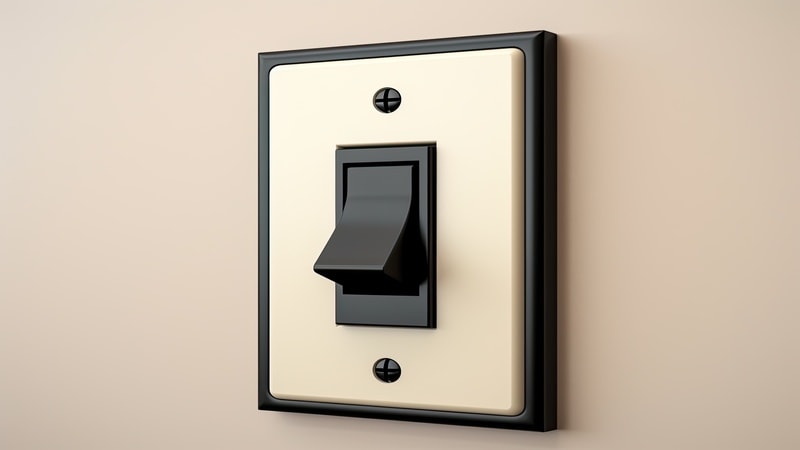
1. Toggle Switch
The toggle switch is the most common up/down switch. This mechanical single-pole switch has a lever or handle to turn on/off the light bulb. It has been widely used in residential projects for decades.
Toggle switches are easy to install and cost-effective. They are typically compatible with all bulb types. But they have no automation or dimming feature. If you are a budget-conscious homeowner or a traditional interior designer, it is the best fit for you.
2. Rocker Switch
Rocker switches work with a rocking motion. They come in square or rectangular shapes with a flat and sleek design. A middle pivot lets this switch move back and forth. This movement opens and closes the electrical circuit, which works as on/off.
Typically, this switch is used in modern lighting for on/off lighting fixtures and other appliances. However, smart rocker switches also have dimming or smart control features. They are best used in contemporary home or office environments.
3. Push Button Switch
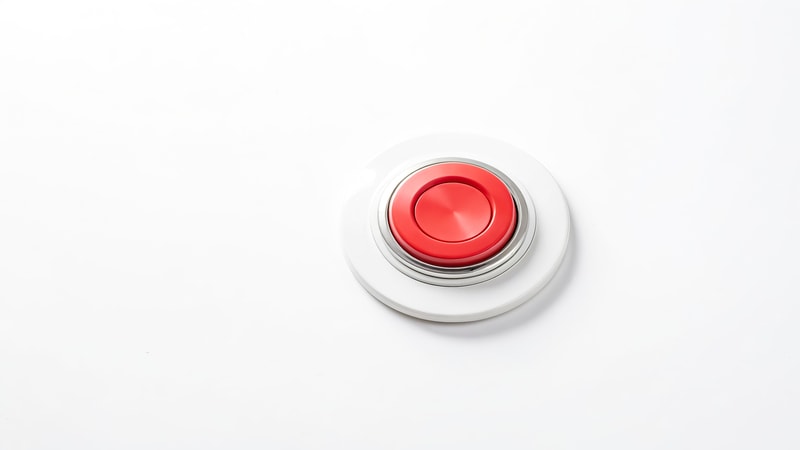
Pushbutton switches are simple and reliable manual pressing buttons. They have a tactile, click-based interface. Push button switches are used to turn on/off light bulbs, electrical devices, appliances, elevator controls, and security systems. They often support smart and touch integration.
Their best use is in retro-style homes, minimal spaces, and boutique interiors.
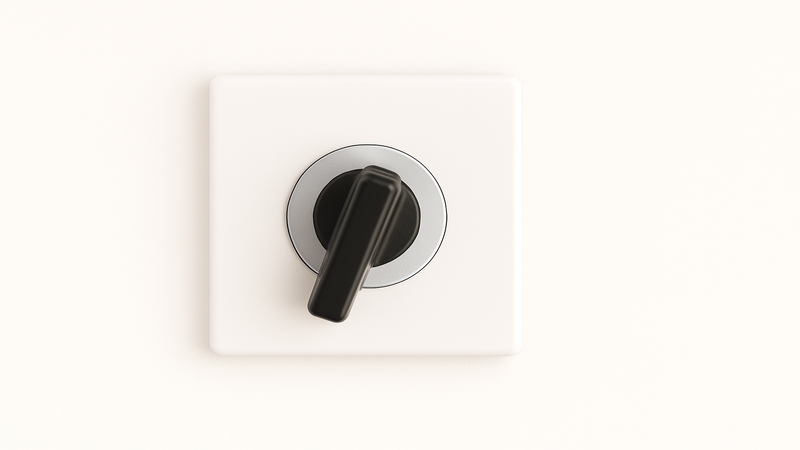
4. Rotary Switch
A rotary switch is a circular-style dimmer switch. It is typically used in old homes to dim incandescent or halogen bulbs.
Rotary switches are also used to set different speeds of the ceiling fan, frequency on a radio, and set or configure the measurement range on a test instrument. Their best use is in restored vintage homes or lamp-based setups.
5. Pull Chain Switch
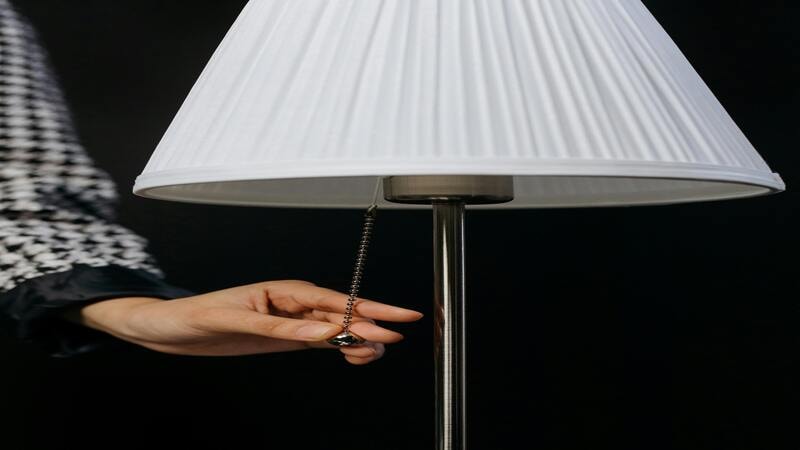
A pull-chain switch is a common on/off switch. It can be found in some light fixtures and ceiling fans where a wall switch is not available. It works by pulling a chain that hangs directly from the fan or light.
This simple light switch type is not suitable for smart upgrades. It can be best used in basement lights, workshops, and basic ceiling fixtures.
6. Double / Combination Switch
A double/combination electrical switch is used to turn on/off two electrical devices from one unit. It saves space and wiring. With a double switch, you can control two light bulbs or appliances from a single panel. It can be used in bathrooms with a fan and light, and kitchens with multiple zones.
7. 3-Way / 4-Way Switch
Three-way electrical switches are used to control light fixtures from two locations. Four-way switches are used in conjunction with three-way switches to control lighting from multiple locations. Their best use is in staircases, large rooms with multiple entrances, and long hallways.
8. Slide Dimmer Switch
This switch is used to adjust the brightness of a light bulb through a slider or a bar. It also includes a switch to turn on/off the light at your preferred brightness level. Slide dimmer switches are available in various types to operate halogen, incandescent, CFL, and LED bulbs.
These switches are available in different designs and colors to complement the interior design. They are best used in residential spaces such as living rooms, bedrooms, and dining areas.
9. Touch Dimmer Switch
Touch dimmer switches use capacitive sensing technology. It lets you turn on/off or adjust the brightness of a light with a touch. It can be used with CFL, incandescent, and LED light bulbs. It is energy efficient and can be paired with three-way switches to control lighting from two locations.
It can be easily installed in indoor and outdoor lighting in residential and commercial spaces. Suitable for tech-focused users.
10. Rotary Dimmer
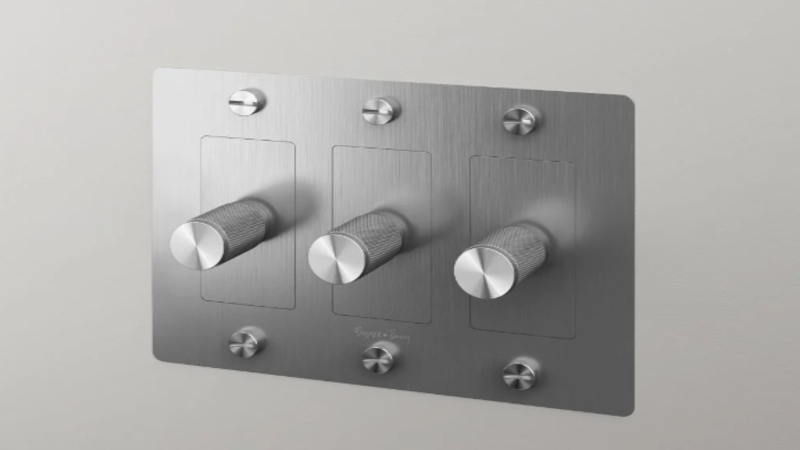
It has a traditional knob to adjust the intensity of light to suit different moods. It contains a push button to on/off the bulb and a rotating dial for brightness adjustment. It works best with incandescent and halogen bulbs. It is suitable for installation in retro decor and budget-friendly renovations.
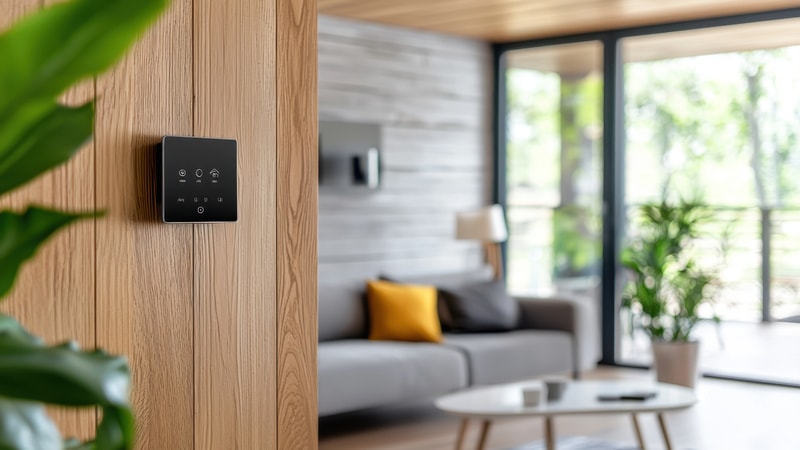
11. Smart Switch
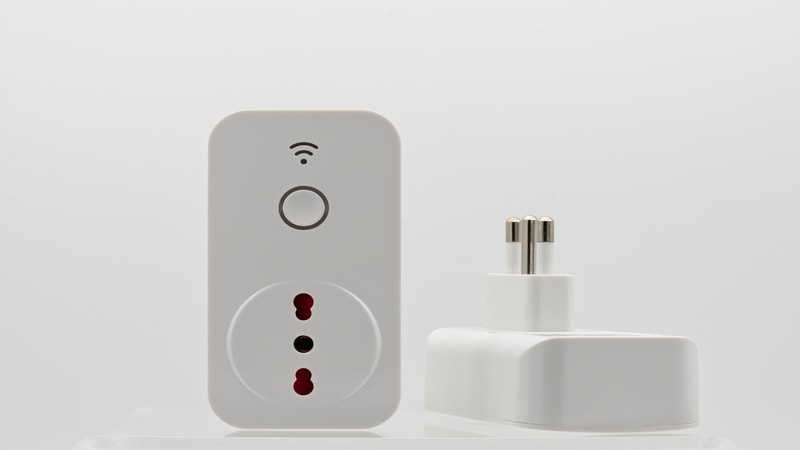
Smart switches are connected to your home WiFi network. It lets you control the lighting and appliances via apps like Alexa, Google Assistant, SmartThings, or Apple HomeKit. With these switches, you can control lights remotely, create a schedule, control scenes, and integrate with sensors.
If you want to complete home automation, it is the best choice.
12. WiFi / Bluetooth Switch
This smart switch does not require a hub; it just connects with your home WiFi or phone Bluetooth. It allows you to control lighting remotely and integrate with voice assistants, Alexa or Google Assistant.
It is easy to retrofit, especially for renters. Best for DIY smart upgrades in small homes or apartments.
13. Motion Sensor Switch
Motion sensor switches turn on/off lights when movement is detected. They use passive infrared or ultrasonic sensors to detect movement within a defined range. It triggers a switch when it detects movement and turns off the lights automatically when no other movement is detected.
It improves energy efficiency and convenience. Applicable in both residential and commercial low-traffic spaces such as entryways, bathrooms, garages, closets, offices, hallways, and parking lots.
14. Timer Switch
Timer switches let you pre-set the lighting schedule. The switch turns on/off lights or appliances based on the set time. It is ideal for saving power in places like gardens, staircases, or ventilation fans. Time switches are great for outdoor lighting, water heaters, and exhaust fans.
15. Voice & Sound-Activated Switch
VOX or voice and sound-activated switch operates by voice command or sound(e.g., clapping) detection. It detects the presence or absence of a sound with a microphone. When detecting a sound at a certain level, the switch turns the lights on/off.
It is useful in accessibility solutions or novelty installations. Great for kids, elderly users, and unique home setups.
16. Remote-Control Switch
A remote control switch comes with a handheld wireless remote. It lets you turn on / off the light or a device from a distance. It consists of a transmitter fitted in the remote and a receiver placed inside the device or light.
It is often paired with bedside lamps or hard-to-reach lights. Give convenience and accessibility in bedrooms, attics, or high ceiling fans or lights.
17. Selector Switch
It is also known as a function switch. With this switch, you can select different modes or circuit positions with the rotation of the knob or handle. It is typically used in industrial or commercial equipment and appliances. Selector switches are used in factories, workspaces, or large appliances.
18. Key Card Switch
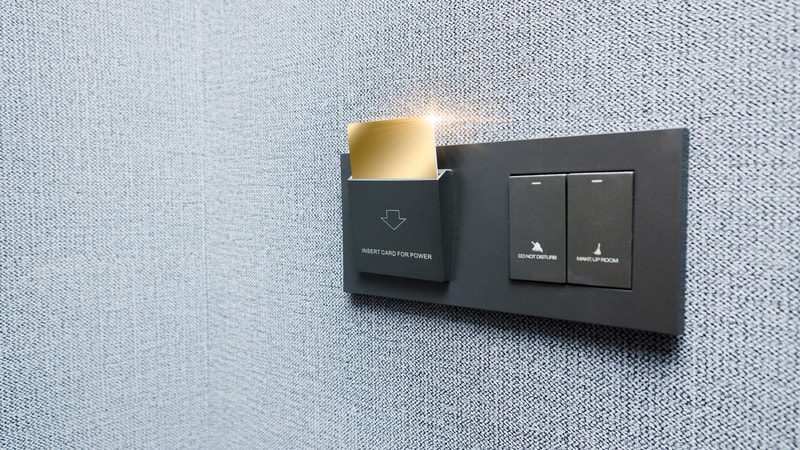
Key Card Switch is commonly used in hotels for lighting control. It turns on the lights by simply inserting the card and off by removing it. It consists of a card and a switch to insert the card. When you insert the card in the switch, it completes an electrical circuit that turns on the lights.
It is best for energy conservation and occupancy-based control in hotels, commercial buildings, and guest suites.
19. Illuminated Switch
Illuminated switches have a glowing light bulb(neon or LED). The light illuminates even when the switch is off. It helps users find it in the dark. It can be best used in bathrooms, hallways, and guest rooms.
20. Proximity / Infrared Switch
A proximity or infrared switch(IR) is activated by a hand wave or body movement. It does not require a physical touch.
These switches emit infrared light, which reflects with a body or hand movement. When reflected on the switch, the photodetector on the switch detects the movement. If the object is within the pre-set range, it completes the circuit or triggers the light on.
It helps to reduce surface contact. It is ideal to use in hospitals, kitchens, and laboratories.
21. Magnetic Reed Switch
Magnetic reed switches consist of two ferromagnetic blades that are sealed in a glass tube. The blades are separated by a distance of a few microns. The glass is filled with an inert gas. In non-operating conditions, the blades remain separate.
When a magnet is close to the switch, the magnetic field around the glass causes the reeds to contact, which turns on the light.
The reeds separate when the magnet is away and turn off the light fixture. Commonly, it is used in cabinet doors, alarm systems, laptops, tablets, and security setups.
Best to use in security systems, industrial automation, and commercial storage.
The selection of a light switch is based on the space and user needs. Different spaces suit light switches that suit the mode and style of lighting.
| Room | Best Switch Types |
|---|---|
| Living Room | Rocker, Dimmer, Smart |
| Kitchen | Rocker, Timer, Motion |
| Bedroom | Smart, Remote, Dimmer |
| Bathroom | Motion Sensor, Illuminated, Smart |
| Staircase | 3-Way, Illuminated |
| Hotel/Office | Key Card, Selector, Smart, Proximity |
| Hospital/laboratories | Proximity/Infrared |
A right switch enhances the comfort, safety, and ease of use. Different switches match different users’ needs.
Switches that are easy to see, reach, and operate with minimal force are ideal for older adults.
If you enjoy smart home automation and advanced control options, you can benefit from these switches:
When affordability is the priority, simple mechanical switches can be the best fit. They offer proper functionality without high costs.
Individuals with physical disabilities or limited mobility need alternatives to conventional switches.
When selecting a light switch, functionality is the key. However, design and visual appearance also influence the overall look of the space. The right bulb complements your space and delivers the functionality you need. Different styles match different aesthetics.
Modern interiors are defined by clean lines, sleek design, and smart technology. Touch switches with a flat, glass-like surface and touch-sensitive controls can add a high-tech and luxurious feel. Rocker switches with a minimalist and smooth design fit seamlessly into contemporary rooms.

Smart switches also match modern aesthetics. They can be best paired with LED technology. They are available in elegant finishes. They offer both style and smart functionality to complement modern lifestyles.
To enhance the vintage style and timeless architecture, the right light switch type matters a lot. They add more charm and elegance. For instance, toggle switches with a classic up-and-down lever design suit older or retro-styled homes. They are available in materials like wood, ceramic, or metal.
Push button switches add a nostalgic nod to early 20th-century homes. Push button switches with antique brass plates provide a vintage aesthetic with modern reliability. The knob-style design of rotary switches echoes mid-century interiors and complements antique decor.
You should select unobtrusive, sleek designs and clean lines, yet functional switches for clutter-free environments. Choose flat, screwless panels. They are sleek and flush-mounted. Give a clean look by almost disappearing into the wall.
Proximity switches are also suitable for minimalist or futuristic spaces. They are operated by waves or motion. With a hand-free control, they offer zero visual clusters.
Industrial and commercial spaces require light switches that can bear high power loads. They must be durable and multi-functional to operate the system. Selector switches are recommended for use in commercial spaces due to their multi-setting control nature.
Magnetic switches are also the best option. They are designed for security systems, cabinets, or machinery with rugged, reliable functionality. To manage energy savings, the timer switch ensures lights aren’t left on unnecessarily. These can be used in commercial restrooms, warehouses, or stairwells.
Light switches seem like a small feature, but they make a big impact on how your space looks and functions. The right switch strikes a perfect balance between style, convenience, and efficiency.
The selection of a light switch should reflect space function, design style, budget, and tech preference. For best results, always match your switch type with compatible LED or smart bulbs, and consult a qualified electrician for a safe, hassle-free installation.
At RisunCorp, we manufacture high-quality LED lighting and light fixtures for modern and classic spaces. With over 15 years of experience, we offer lighting solutions that blend functionality with aesthetic appeal.
Want to upgrade your home lighting? Discover our products page or directly contact us to get expert consultation and personalized recommendations.
Today, light switches come in different types and functionalities. These include toggle and rocker switches to smart, dimmer, sensor, and specialty commercial switches.
The main difference between a rocker and a toggle is their design and functionality. A toggle switch uses a small lever that flips up or down to control the light. It has a classic look and supports multi-way switching. A rocker switch features a flat, wide surface that rocks back and forth. It offers a modern design used for simple on/off functions.
Yes, if the wiring is compatible. Some smart switches require a neutral wire. Also, smart switches are often not compatible with older lighting fixtures, motors, and ceiling fans.
Yes, they improve energy efficiency and convenience, especially in bathrooms and utility areas.
Motion sensors, timer switches, and smart switches are the most energy-efficient options.
Yes, they work as the regular on and off switch without WiFi. But to use advanced features, they require an internet connection.
Lighting colors and brightness affect pets’ well-being. Their sensitive eyes and vision respond differently to different colors. Harsh or flickering lights can disturb their sleep-wake cycle.
If you want to create a pet-friendly environment, you’d better transform the indoor lighting. Here, you will learn expert pet tips for better indoor lighting to help your furry companion thrive.

LED light not only influences our health, but it also impacts our pets physically and mentally more than you think. Animals are more sensitive to certain colors and flicker than human eyes. Poor or flickering LED lights disturb their sleep-wake cycle. The food intake and behavioral responses can also be changed.
Proper indoor lighting has a positive impact on their physical and emotional health. Harsh or overly bright LED lights increase stress and agitation in their behavior. Soft blue hues during the day can help maintain a healthy circadian rhythm.
For a safe, calming, and stress-free environment for pets, choose light bulbs with the right color and brightness with the proper setup.

Yes, LED lights are created with LED technology, which is completely safe for pets. The color temperature, brightness level, and light direction have negative and positive impacts. The following tips can help you create a better lighting space:

Pets see the world differently. The colors that cats and dogs see are different from each other. Cats are sensitive to flickering and color saturation. Dogs are affected by brightness and motion. So, choose LED lights from reputable lighting manufacturers to create calming effects.
Cats enjoy soft, cool tones of lighting. Bright or flashing LED lights overstimulate them, especially in playing or resting zones. Avoid fluorescent lights in pet resting areas.
Soft blue LED light or green tones provide a calming effect. Daylight white LED light with a color temperature around 5000 K- 6500 K mimics natural light, ideal for playtime.
Avoid intense red or blinking LED lights because they can irritate cats’ sensitive visual system. Intense red light bulbs disrupt their circadian rhythms and trigger anxiety. Blinking LED lights can cause seizures and make them overactive at night.
Dogs’ eyes respond well to warm, white tones and natural daylight colors during the day. Warm white light and soft yellow tones help dogs feel calm and secure. Light Blue tones create a natural daylight atmosphere, which supports alertness and natural rhythms.
Avoid cool whites(3000 K-5000 K) or bright blues in LED light bulbs in rest areas. They can disrupt sleep or cause anxiety. In thunderstorms or stressful events, dimmed yellow or amber LED lights can soothe nervous dogs.

Most of the pet owners wonder, “Does red light hurt cats’ eyes?” No, cats are less sensitive to red lights, and generally, red light does not hurt cat eyes. But you need to consider some facts before placing a red light bulb in your cat’s place.
Cats can see some red hues, but their eyes are not built to handle intense, saturated reds for long periods. A safe rule of thumb is moderation, and always allow your cat to retreat to a low-light area if they want.

Poor lighting causes eye strain and discomfort in pets. The right light source can improve pet comfort and mood. Avoid fluorescent bulbs as they emit UV light. Too much UV light exposure can harm pets’ eyes and skin over time.
With these research-backed lighting strategies, you can create a better home environment for your furry companions.
LED dimming bulbs help you fine-tune brightness throughout the day. Use warm white LED lights and fluorescent lights in rest zones. The 2700K–3000K range color temperature promotes calm and sleep.
Cooler white LED light between 5000K–6000K color temperature with high CRI simulates natural daylight. It is suitable for daytime play and keeps animals active.
Indoor pets rely on consistent light cycles. Automatic timers replicate sunrise and sunset patterns. It helps regulate your pet’s circadian rhythm. Also, reduce behavioral stress in indoor-only pets.
Senior pets or impaired vision become disoriented in total darkness. They feel comfortable in low-light conditions to walk easily at night. Install low-lumen nighttime lighting near pathways, litter areas, and food bowls. It will help them to move confidently. They feel secure during nighttime hours.

Avoid LED lights with strobe or flashing modes. These lights can overstimulate pets and trigger anxiety or disorientation in cats, small dog breeds, or nervous pets. Use non-flickering illumination in pet zones. Full-spectrum bulbs provide a broader spectrum of visible light.
Direct glare can strain your pet’s eyes and disrupt their relaxation. Choose lamps with shades and anti-glare LED lights. Bounce light off walls or ceilings to soften illumination in sleeping areas.

Pets feel comfortable when the light doesn’t shine directly in their eyes. Place LED light fixtures higher up or on the ceiling. It will distribute light evenly without glare or visual discomfort. So the pet can eat, play, or rest comfortably.
LED bulbs come with smart features. With smart LED lights, you can get full control of your home ambiance. You can create personalized light settings according to your pet’s mood and routine.
Use smart lighting schedules to turn lights on or off. You can adjust brightness or color temperature automatically. This will help mimic natural sunrise and sunset patterns. It will provide indoor pets with a steady, calming day-night rhythm.
Dogs and cats sleep well in complete darkness. Exposure to artificial light at night can disrupt melatonin production. This interferes with their sleep-wake cycle. Turn off all main lights at night to support healthier, more restorative rest.
Smart dimmable LED light bulbs let you fine-tune light intensity. You can keep the brightness low during rest times. Set the light brighter during feeding or play for a more comfortable environment.
With smart LED lights, you can set up pre-programmed lighting “scenes”, such as calm mode, play mode, or bedtime lighting. You can switch between activities with one tap or voice command.
Philips Hue, LIFX, and Govee apps let you get full lighting control on your smartphone or tablet. Some platforms even offer pet-specific lighting presets designed to reduce stress and support your animal’s natural rhythms.

These pet-friendly lighting ideas can help you meet the unique needs of cats, dogs, and senior pets.
Daylight white LED lights with (5000K–6000K) emit sunlight. It is ideal for active play areas. Soft blue light or greens have a calming effect on cats. It also reduces overstimulation.
Cats prefer complete darkness for deep sleep or dimmable warm whites (2700K–3000K) for light-sensitive zones. Avoid shorter wavelength light, like blue, which can interrupt rest. Harsh or flickering LED lights can stress cat eyes.
Warm yellow or soft amber LED lights relax dogs. They feel secure and also promote better naps. Avoid shining bright lights directly into your dog’s eyes. It can cause eye strain. Learn the pros and cons of LED and use low-brightness soft blue or neutral white LED light in areas where your dog unwinds.

In loud weather, create a smart “thunderstorm mode” scene with warm, soothing hues. It will reduce anxiety and stress. Avoid overly bright lights. Dogs are less light-sensitive than cats but still benefit from soft, consistent lighting.
Nightlights with motion sensors can help older pets move safely. It helps reduce nighttime anxiety in senior pets. Choose frosted LEDs or light bulbs with diffusers to minimize glare. Automatic lighting schedules can avoid sudden changes that can confuse senior pets.

Proper indoor lighting can not only improve your home’s aesthetics but also enhance your pet’s physical and mental well-being. Dimmable, warm-tone LEDs create a relaxing environment, allowing them to sleep better and feel more secure.
With smart LED bulbs, you can adjust the lighting to your pets’ moods, age, and behavior. So, it’s essential and beneficial for your pet’s health and happiness.
At RisunCorp, we believe in whole-pet wellness because lighting matters as much as love. Our expertly designed pet-friendly LED solutions support healthier, happier indoor environments for your furry companions.
Reach out to us to get personalized lighting advice for your pet’s unique needs now!
Soft blues, greens, and warm white(3000 K- 4000 K) tones are considered ideal for cats. Avoid using strong reds or flashing lights.
No, but some colors (like harsh blue or cool white) can increase anxiety. Stick to warm whites or soft yellow tones.
Yes, red light is safe for pets, and it has some therapeutic effects on them. But without moderation, like using red light continuously or at high brightness levels, it can cause anxiety and make your pet overactive.
Dimmable warm lights during the evening and red lights at night create a darker space for pets at night. A darker space supports healthy melatonin production and gives a better sleep experience.
Ready to get started ?
Send Your Inquiry
Our team will get back to you promptly
please
download
Get notified about new products
Our team will get back to you promptly!