Tired of your house looking dull and meek. Would you like to make it stand out? Simple, all you need to do is invest in an LED light solution. How does that help?
LED lighting has now become the go-to choice for a lot of owners who want to make their houses look more appealing while also reducing their energy bills.
Moreover, because of their long lifespan and usability, they make for an attractive solution for most houses.
But, like most things, there are a few disadvantages of LED lights that can have a great impact on your experience. What are they? If you want to know, then continue reading.
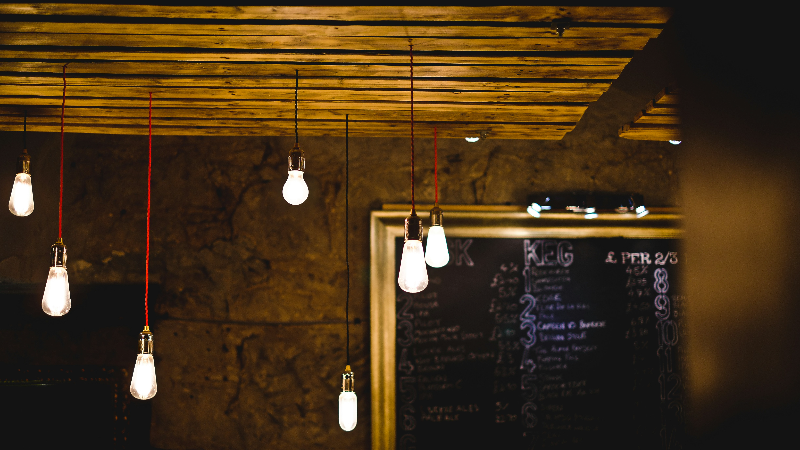
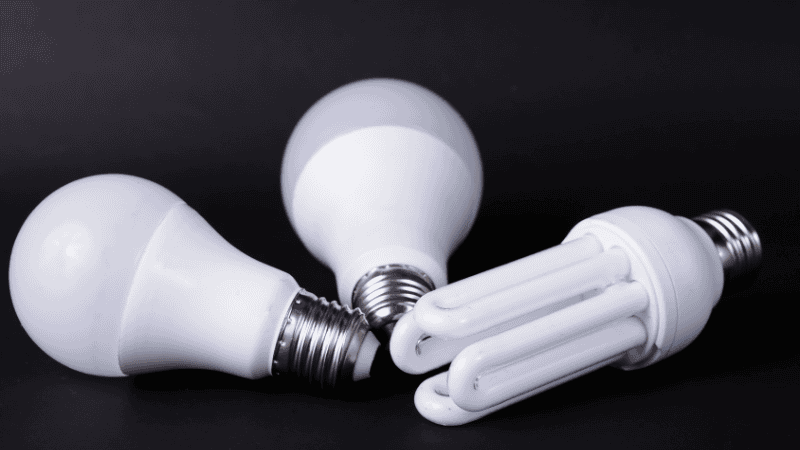
If you are unfamiliar with LED lighting. These lights have a light-emitting diode that uses semiconductors to create light when electricity passes through them.
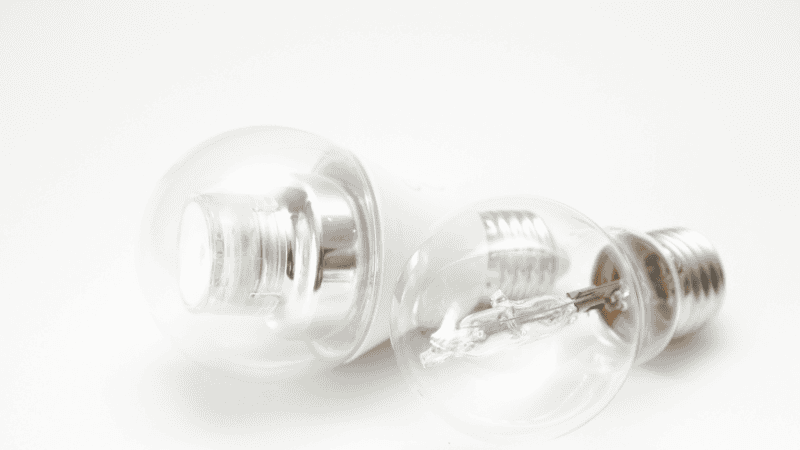
This process is completely different from the traditional incandescent bulbs, which rely on heating filaments to create light.
Moreover, LEDs are able to produce light more efficiently with much lower energy consumption. Making it more energy-efficient than its counterparts.
Plus, LEDs can last up to 25,000 to 50,000 hours compared to incandescent bulbs, which last 1,000 hours, and this adds to the advantages of LEDs.
One of the main advantages of LED lights is their energy efficiency. LED bulbs use much less electricity than incandescent and CFL bulbs, making them a smart choice for homeowners who want to lower their energy bills.
In addition, LEDs convert almost all the energy they use into light rather than heat. This means they waste very little energy while still providing bright illumination.
For those looking to reduce their carbon footprint, LED bulbs are also a more eco-friendly option. They use up to 80 percent less energy than traditional incandescent bulbs.
Even though most LED lights have a much higher upfront cost compared to traditional light bulbs. But because of their long-term savings, LEDs are a much more worthwhile investment.
Moreover, since these bulbs are energy-efficient, they aid homeowners by greatly reducing their utility bills, which is why LEDs are a much more cost-effective option in the long run.
Do you like waiting for your room to become bright enough to see clearly? Of course not. But that’s often the case with traditional bulbs, which need time to warm up before reaching full brightness.
LED lights, on the other hand, turn on instantly. As soon as you flip the switch, the room is fully lit. This is especially useful in places where immediate lighting is important, such as bathrooms, kitchens, or outdoor areas.
Another benefit of LED lights is their versatility. They can be used in many different ways and are available in a wide range of colors, shapes, and sizes. This makes it easy to find the right lighting solution for any area of your home.

LEDs are also suitable for outdoor use and commercial spaces, making them a flexible choice for many settings.
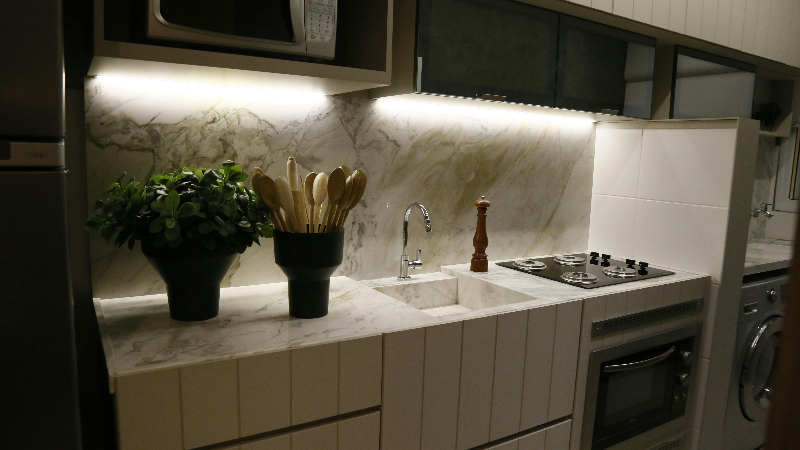
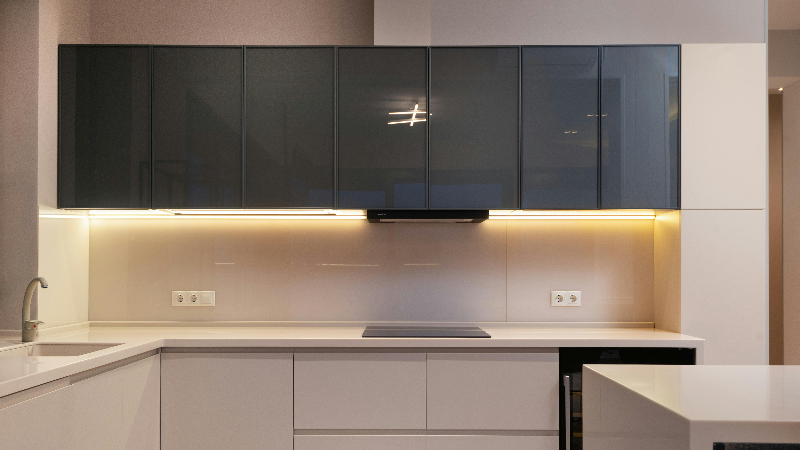
Whether you need under-cabinet lighting in the kitchen or soft ambient lighting in the living room, LED lights can provide the perfect solution.
LED lights are also really environmentally friendly. How so? First, they don’t use any mercury like the CFL bulbs, which can be really harmful if they break or aren’t disposed of correctly.
This is compared to the fact that LEDs are fully recyclable, which makes them a better option for homeowners who want to reduce their environmental impact.
Another advantage of LED lights is their durability, making them a great choice for high-traffic areas and outdoor use. Unlike traditional bulbs, LEDs are built to resist shattering and can handle impacts, vibrations, and extreme temperatures.
This tough design makes them ideal for places like garages, outdoor lighting, and workshops where lights are more likely to face wear and tear.
While LED lights are highly efficient, they can be sensitive to high temperatures. Too much heat can affect their performance and shorten their lifespan. When exposed to extreme heat, LEDs may lose brightness and wear out faster.
So, how can you prevent this? First, install LED lights in well-ventilated areas and keep them away from objects that generate heat.
Also, avoid using enclosed fixtures in hot spaces, as this can trap heat and cause the bulbs to overheat. This is one of the few drawbacks of LED lighting.
One more downside of LED lights, especially the ones with higher color temperatures like cool white or daylight, is that they led lights produce blue light and light pollution.
Why is this a problem? Blue light from some LED bulbs is very intense and can disrupt your sleep and strain your eyes. This is one of the biggest downsides of LED lighting, especially if you’re using it at night.
The longer you’re exposed to blue light, the more it can interfere with your body’s natural melatonin production, making it harder to fall asleep and stay rested.
To protect your sleep and well-being, the International Dark Sky Association recommends choosing LEDs with lower color temperatures, like warm white. These softer lights are much gentler on your eyes and better for evening use.
In many cases, LED lights can be sensitive to voltage fluctuations. If you use them with the wrong dimmer switches, they may start to flicker, buzz, or even fail completely. This can also lead to poor light quality.
To get the best performance from your LED lights, always use dimmers that are compatible with LEDs. This helps avoid flickering and other issues caused by voltage problems.

You can also install a surge protector to reduce the risk of damage from electrical spikes and keep your lighting consistent and reliable.
While LED lights can brighten a room instantly, they do have a limitation when it comes to how the light is spread.
What does this mean? Unlike traditional bulbs that shine light in all directions, LEDs produce a more focused beam. This makes them great for task lighting or accent lighting, but not always ideal for general room lighting on their own.
If you want more even and balanced lighting in a space, you may need to combine LED lights with other light sources or use diffusers to help spread the light throughout the room.
A thing that makes most people step away from investing in LEDs is their higher upfront cost compared to traditional light bulbs like incandescent or CFL. This can be a major issue for homeowners who are renovating their homes and want to replace all of their bulbs.

As mentioned earlier, LEDs have a long lifespan and use much less energy than traditional bulbs. This means that even though they may cost more upfront, they can save you a lot of money over time.
Thanks to lower electricity bills and fewer replacements, LED lights are a smart and economical investment for the long run.
One downside of some LED lights is that they emit a lot of blue light. This can interfere with your sleep and cause eye strain, making it harder to relax and get the rest you need.
If you are sensitive to blue light or want to protect your sleep, it’s best to choose LED lights with warm colors.
You can also use smart lighting that lets you adjust the brightness and color to a softer, more comfortable tone. Making this simple change can help you feel calmer and enjoy the restful sleep you deserve.
Although LED lights use less energy than incandescent bulbs, their production still affects the environment. LED bulbs require rare materials like indium, gallium, and aluminum, which are often mined in sensitive areas.
The mining, production, and disposal of these materials can harm the environment around those areas.
That is why it is important to choose LED bulbs that are made sustainably and carry eco-friendly certifications. This way, you can reduce your impact on the planet while enjoying energy-efficient lighting.
LED lights are known for their long lifespan, but they are not completely fail-proof. Poor installation, improper use, or exposure to extreme conditions can cause LEDs to stop working sooner than expected.
To make sure your LEDs last as long as possible, proper installation and regular maintenance are essential. Taking care of your lights means you get to enjoy their benefits without interruptions.
Having many color options can be both a blessing and a challenge. LEDs come in a wide range of colors, which can feel overwhelming if you don’t know what to choose.
If you prefer the simple feel of traditional incandescent bulbs, it might take some time and experimenting to find the perfect LED lighting. But the variety also means you can create a personalized lighting experience that matches your style and mood perfectly.
Many LED lights now come with smart features, allowing you to control them remotely or program them to adjust automatically as part of your smart home system.
While this adds great convenience, it can also become a problem if the LEDs are not installed correctly or if they are not compatible with your system. Using the wrong products or poor installation can cause lights to malfunction.

To avoid frustration and get the best performance, make sure to choose LED lights that work seamlessly with your smart home setup. This will help you enjoy the full benefits of smart lighting without any hassle.
To give you a much more comprehensive look. Here is a simplified comparison between LED lights vs Traditional Lighting.
| Feature | LED Lighting | Incandescent Bulbs | CFL Bulbs | Halogen Bulbs |
|---|---|---|---|---|
| Lifespan | 25,000–50,000 hours | 1,000 hours | 8,000–15,000 hours | 2,000–4,000 hours |
| Energy Efficiency | Uses 80% less energy than incandescent | Very inefficient and has high ambient temperatures | More efficient than incandescent but less than LEDs | Less efficient than LEDs |
| Light Output | led bulbs emit full brightness | Instant full brightness | Takes time to warm up | Instant full brightness |
| Lifetime Cost | Higher upfront, but saves money long-term | Cheap initially, expensive over time due to energy use | Moderate cost savings | Moderate savings, but still higher costs than LEDs |
Knowing the pros and cons of LED lights is a great start, but finding the perfect LED lighting for your home involves a few important steps.
First, think about the purpose of the lighting. If you need task lighting, look for LEDs with a high color rendering index (CRI) for accurate, clear colors. For a cozy, relaxing atmosphere, warm LED lights work best because they create a soft and inviting glow.
Next, make sure the LED light you choose is compatible with your existing fixtures and dimmers. This will help you avoid problems like flickering, malfunction, or having to replace fixtures.
Remember, not all LED lights are the same. Choose products from trusted brands to ensure reliable performance and lasting quality.

Even though LED lights offer a lot of advantages, like energy efficiency, longer lifespan as well and being environmentally friendly. But that doesn’t mean that they don’t come with their fair share of disadvantages, like blue light emissions, compatibility, and so on.
This is why it is important that you should know what kind of LED light you want to invest in before actually making a purchase.
Struggling to find reliable LED lighting? Stop worrying and visit Risun, a trusted LED lighting provider with solutions designed for every home and lifestyle.
Contact us today and create the perfect atmosphere in your living space with our high-quality products and expert guidance.
Q1: What is the lifespan of an LED light?
Most LED lights last between 25,000 and 50,000 hours, depending on the brand and how you use them.
Q2: Why are LED lights more expensive than incandescent bulbs?
LEDs use advanced technology to be energy-efficient and provide instant brightness, which makes them more costly upfront.
Q3: Can LED lights cause headaches?
People sensitive to blue light may experience headaches, and blue light exposure can also affect sleep.
Q4: Why do some LEDs flicker?
Flickering is often caused by incompatible fixtures or dimmers, or voltage fluctuations.
Floodlights and spotlights both serve different needs. If you are confused about choosing the right LED light, you are not alone. As we all know, home lighting technology has gone through many changes in recent decades, and with so many different options to choose from, we often become muddled or confused.
Don’t worry—we have a practical guide that answers any questions you might have. Including the differences between a spotlight and a floodlight and their uses. Now, let’s begin discussing the pros and cons and different scenarios in which these lights may come in handy.

Outdoor lighting intensifies safety and practicality. It also amplifies the aesthetics of certain places, making them more magical. This is why it is always necessary to choose the right lighting for outdoor adventures.
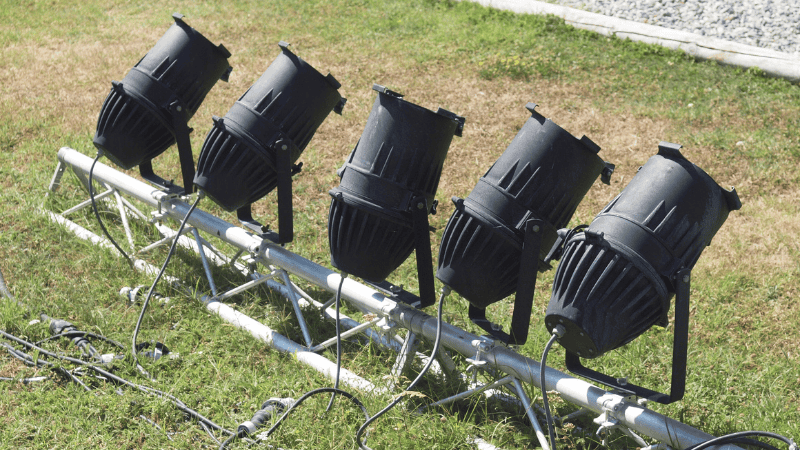
They are best for larger areas because they can illuminate a large amount of land due to their wider flood beam patterns, which are at least 45 degrees. They are usually used commercially, as well as for backyards or even driveways, because they provide abundant light, enhancing safety.
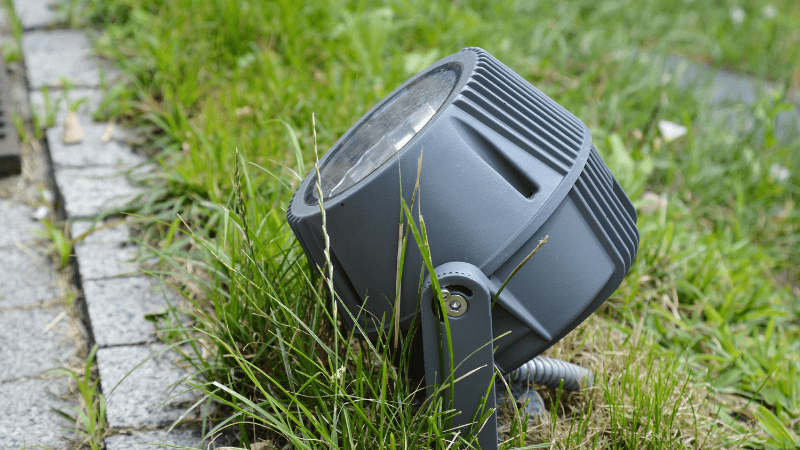
Spotlights are said to be best for illuminating smaller, specific spaces, as they give off a dramatic vibe. They are mostly used as landscape lighting to illuminate trees and enhance architecture. Spotlights have a smaller, more focused beam of light with a maximum angle of 30 degrees.
These LED light bars are considered versatile. They are very durable, sturdy, and waterproof. Their flexibility and versatility make them a sought-after option for use outdoors, in harsh atmospheres, and in vehicles.

The key uses of spotlights are security lighting, made to scare off intruders; landscape lighting, which highlights gardens and trails; and structural lighting, which enhances and illuminates particular details in architecture and building structures.
No matter the use, these lighting options are flexible and deliver style and practicality at once.
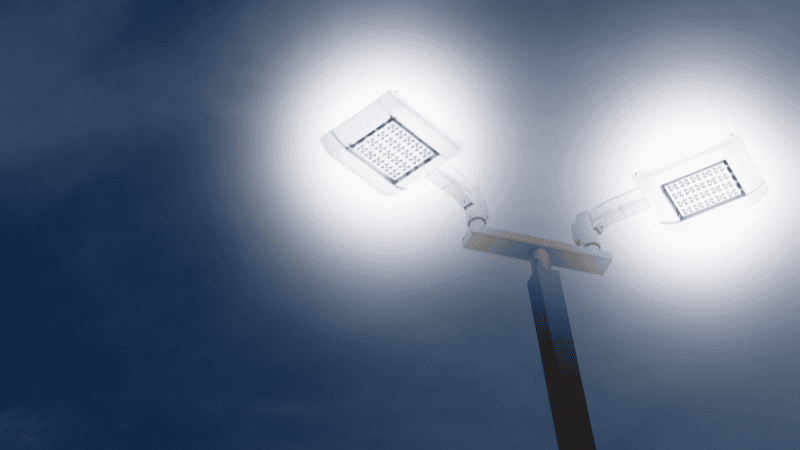
A Floodlight is a high-quality, intense light fixture used to illuminate large areas. It is mainly used outdoors, such as in driveways, gardens, stadiums, backyards, and commercial spaces. These lights provide practicality, aesthetics, and security.
Due to their capacity to brighten larger areas, floodlights are crucial for outdoor activities. Considering everything, floodlights are a sought-after choice for energy-efficient lighting.
There are three main types of floodlights. Let’s break them down below.

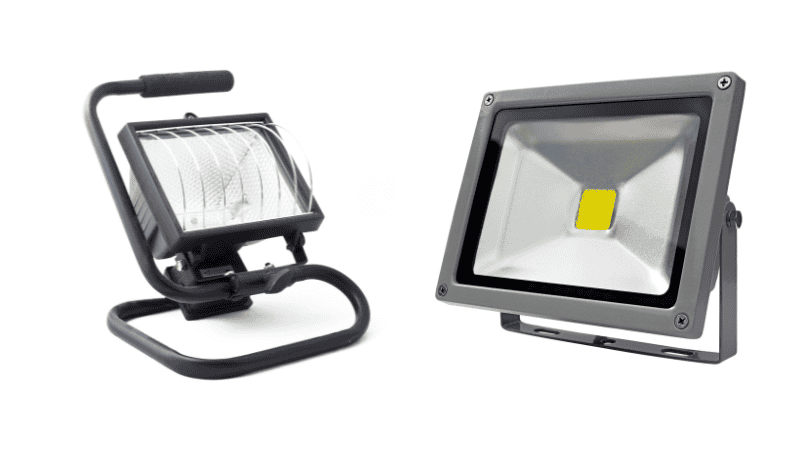
Halogen floodlights are known for producing a warm glow. Although they are less energy-efficient, they are a good option when a bright light is needed for a small amount of time. Halogen floodlights are said to have a shorter life than LED floodlights.
They are energy efficient and known to have a longer lifespan. Sometimes, users express LED lighting problems due to flickering and temperature problems, as they are too bright and look unnatural. In spite of these disadvantages of LED lights, they still remain a popular choice among customers.
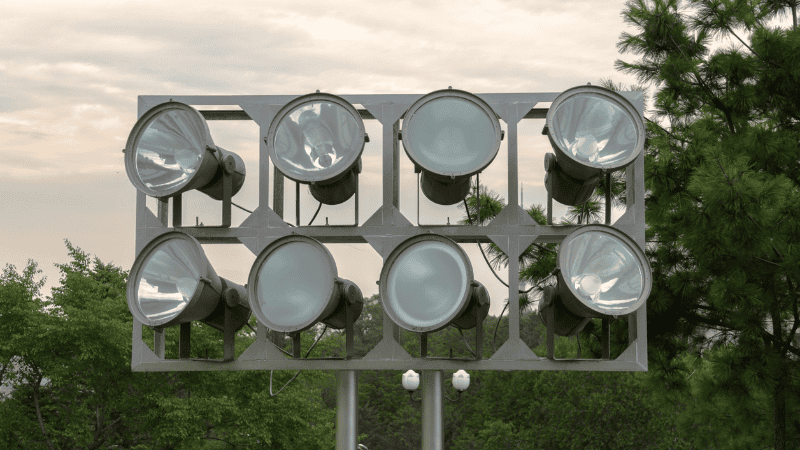
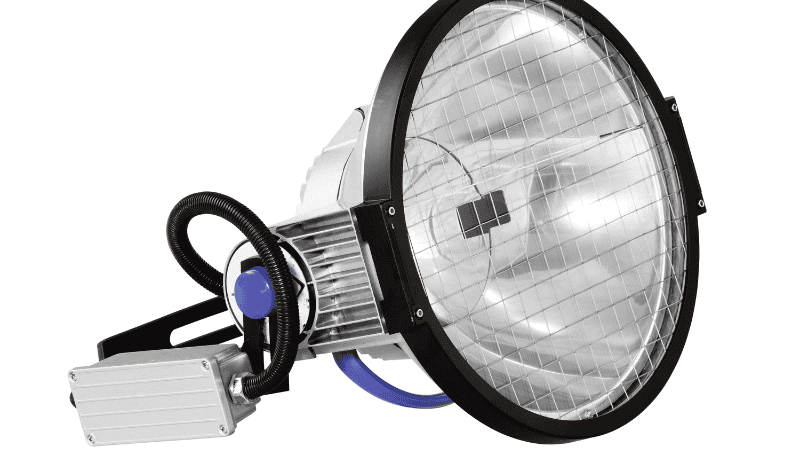
Metal-halide floodlights are known as high-intensity light fixtures, which are commonly used in stadiums and sports fields, but they are less efficient than LED lights.
Floodlights are designed with key characteristics that make them easy to use and effective for a range of outdoor illuminating purposes.

A Spotlight is an architectural lighting fixture used to highlight specific areas. It is considered best for accent lighting in housing areas and even commercial spaces.
Spotlight bulbs come in various types, each offering unique characteristics and benefits tailored to specific lighting needs.
The light bulbs in LED spotlights are highly energy-efficient and provide a focused, bright light while consuming minimal power. Due to low energy consumption, LED spotlights are ideal for both commercial and residential use.
Incandescent spotlights, with their warm, soft glow, are mostly used for accent lighting or decorative purposes, creating a cozy atmosphere.
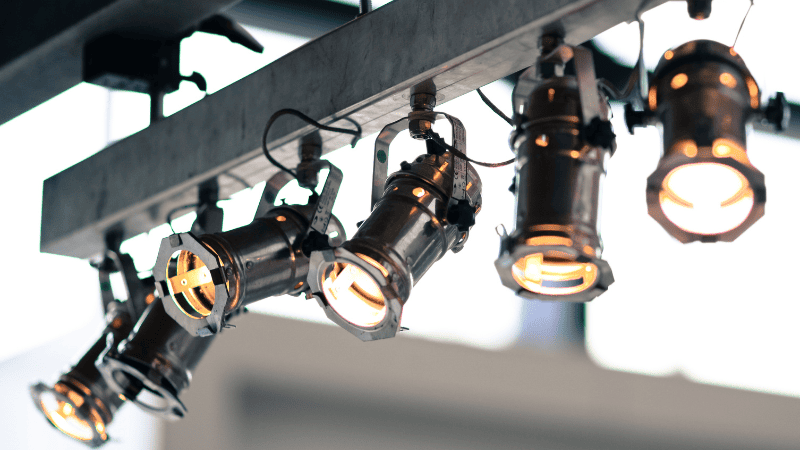
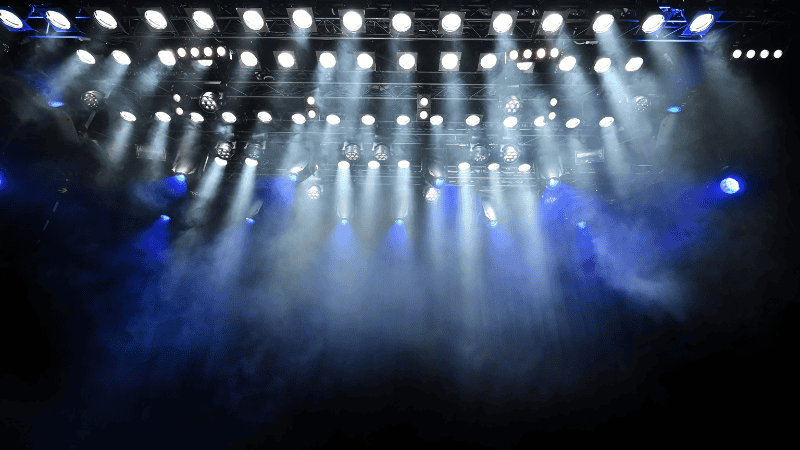
Halogen spotlights, known for their bright, intense light, are commonly used in performance venues like theaters and concert halls. They deliver exceptional brightness but consume more energy.
Spotlights are versatile and energy-efficient lighting solutions, perfect for accentuating specific objects or spaces with precision and intensity.
Understanding the main differences between floodlights and spotlights can help you determine which lighting fixture is best suited for your needs.
While both types serve distinct purposes, they vary in various factors and applications. Below is a breakdown of these differences, allowing you to make a well-informed decision.
| Aspect | Floodlight | Spotlight |
|---|---|---|
| Beam Angle | Wide, diffused beam for even coverage of large areas | Narrow, concentrated beam for focused lighting |
| Intensity and Coverage | Illuminates large areas such as outdoor spaces or fields | Focuses on smaller areas or objects like statues or stages |
| Applications | Used for general illumination in parking lots, backyards, and security lighting | Ideal for accent lighting, such as landscape features, art, or stage performances |
| Energy Efficiency | LED models are energy-efficient but can consume more power than spotlights in certain setups | LED models are highly energy-efficient with lower light intensity. |
| Durability | Generally more robust and built for large outdoor spaces | Can be durable, but some models (e.g., incandescent) may not last as long |
| Installation | Requires more installation space due to wider coverage area | Easier to install, typically more compact and focused |
| Light Spread | Uniform light spread across large areas | Creates dramatic, focused light on specific features or objects |
| Cost | Typically more affordable for large-scale applications | Can be more expensive per unit for high-intensity lighting |
Choosing between a floodlight and a spotlight depends on what you need from your outdoor space or event. While floodlights are perfect for illuminating large areas, the limelight is ideal for showing each feature or object. Here’s when you should use each:
Floodlights are ideal for security lighting in large outdoor areas. They provide a wide field of illumination, making it easier to deter intruders and monitor the area. Their broad coverage ensures that nothing goes unnoticed.
Floodlights are the go-to choice for general outdoor illumination. Whether it’s for your yard, garden, parking lot, or sports field, these lights offer powerful coverage, brightening large spaces and enhancing visibility for safety and aesthetics.
Landscape spotlights are perfect for highlighting specific features in your building. They can be used to accentuate statues, fountains, trees, or architectural details. They create a focused beam of light, bringing attention to the elements you want to stand out.
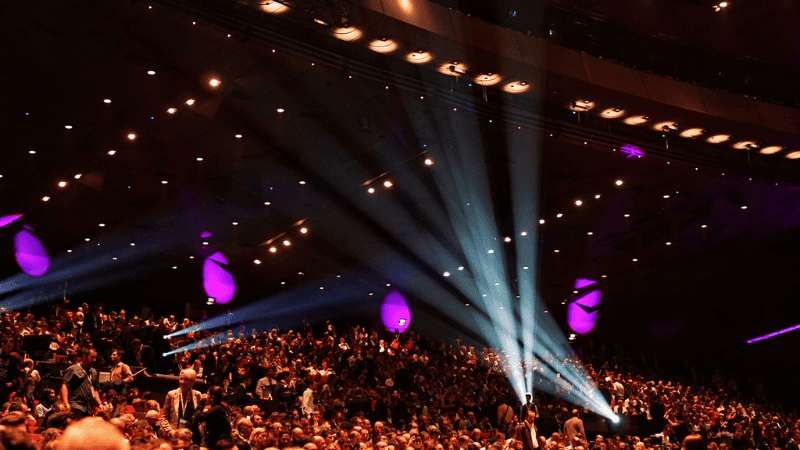
Spotlights are commonly used in stage lighting for performances, concerts, and theatrical productions. Their narrow beam allows them to focus on performers, props, or specific areas on stage, creating a dramatic effect that draws the audience’s attention.
When it comes to landscaping, both floodlights and spotlights have their place. Floodlights are excellent for providing general lighting across broad outdoor areas, while spotlights are best for showcasing individual trees, sculptures, or architectural elements, creating focal points in the area.
Floodlights are designed for bright, general lighting. Their broad coverage makes them ideal for larger landscapes and security purposes. Here’s a deeper look into their pros and cons.
Higher Energy Consumption in Halogen Models: While LED floodlights are energy-efficient, halogen floodlights can consume significantly more power, which makes them less ideal.
The beam angle is a simple way of measuring the spread of the light from its brightest point to when its intensity drops to 50%. This means that if your light produces wider angles, it creates diffuse light, whereas a narrow-angle light can create a much more focused light.
By having a better understanding of the beam angle, you will be able to effectively select the ideal light for your outdoor use, including flood, spot, or combination patterns.
Choosing the right light all depends on what you need, and the best way to do that is by finding out the beam angle you want as well as the type of pattern and intensity you are looking for.
For instance, both flood and spotlights come in LED, which will not only allow you to keep your outdoor area bright but also save cost at the expense of a narrower beam angle.
What this means is that you will need to match your power, budget, and the area you want to cover before making the investment.
One great thing about outdoor lighting is that it can be used for multiple applications, like emergency searches.
Moreover, LED light bars can greatly help individuals with better off-road visibility, whereas spot light can create drama, and architectural lighting can showcase the best feature of a building or make a unique visual impact.
Here are some useful tips that you will need to keep in mind before investing in a lighting solution.


Now that you understand how beam angles and lighting patterns impact outdoor spaces, it’s time to choose the right solution for your needs. Opt for LED lighting to enjoy energy efficiency, durability, and long-lasting performance.
Are you still unsure about which lighting solution you should choose for your outdoor lighting? Don’t worry — it is a very common issue that can easily be solved with the help of a reliable service provider like Risun.
We offer our customers a bunch of outdoor lighting solutions that are tailored to each of their specific needs. If you are instructed and want to learn more you can request a free consultation.
Q1: What’s the difference between a floodlight and a spotlight?
A floodlight provides broad, general illumination, while a spotlight has a narrow beam designed to highlight specific features.
Q2: What is the beam angle of a spotlight and a floodlight?
Floodlights have a wide beam angle, typically between 90 degrees and 120 degrees, while spotlights have a narrow beam angle, often between 10 degrees and 40 degrees.
Q3: What makes LED outdoor lighting different?
LED lights are energy efficient, durable, and long-lasting, making them a cost-effective as well as environmentally friendly choice for outdoor lighting.
Q4: How do I choose the right outdoor lighting for my space?
When selecting flood lights or spotlights, consider the area size, beam angle, and lighting effect you want to achieve. LED options offer the best energy efficiency and longevity.
Have you ever looked at your kitchen and thought, “This place seems to lack something.” This is a very common feeling among homeowners who recently might have just renovated their kitchen. And even with all the fancy new cabinets and flooring there just seems to be something missing.
Would you like to know what that missing peace is? Well, it’s nothing more than a comfy little toe-kick lighting.
These little flooring or under-cabinet lighting not only aid in your kitchen atmosphere but also increase its functionality. If you have just become even a little bit curious, then continue reading because today we will be discussing the advantages of toe kick lighting and which ones are best for which area of the kitchen.
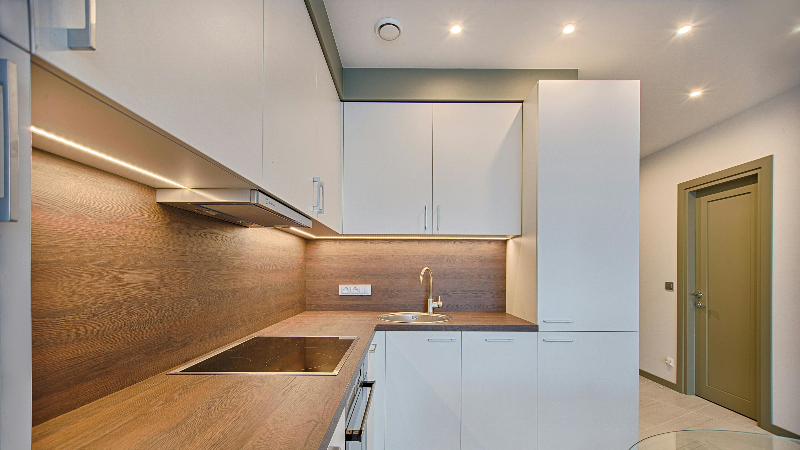
Before we go in-depth with the whole kitchen lighting ideas – it is best that you understand the tools you’ll be dealing with, specifically the toe kick LED lighting.
Now, to kick things off, these flat, long strips of LED lights can be installed at the base of your cabinets or furniture – allowing you to illuminate the “toe kick area,” which is the space beneath the lower edge of your kitchen cabinets and/or other furniture.
While these LED lights are a commonly used household item, they are typically used in kitchens, bathrooms, or staircases if the area allows it. Because these lights are able to produce soft low-level light – they can add a lot of elegance to the kitchen while also highlighting the cabinets or flooring in the process, allowing you to create a welcoming environment.
While most individuals might be only familiar with the flat LED toe kick lights since they are the most commonly used ones, there are a few different options available like join custom lengths, and all of those provide a different advantage to their users. Below is the aforementioned lighting.
This might be one of the most commonly used toe kick lighting in any household – and there is a reason for that. These LED lights are energy-efficient and are known for having a long lifespan – plus, these lights are able to produce soft and consistent light that is able to increase the atmosphere of your kitchen.
Moreover, these LED lights are viable in many different colors and temperatures with the added bonus of coming with a dimmer – which allows homeowners to customize the ambiance of their kitchen without requiring any additional help.
The puck lights are small in size and have rounded fixtures, which can also be used as toe-kick lighting installations. These lights also make sure of the LED tech which allows them to produce less heat emissions with the addition of long-term durability. Also, these lights can be used in two ways which include being surface mounted or recessed beneath the cabinets for a much more sleek and professional look.
The second most popular option when it comes to toe kick lighting since these LED lights are able to evenly illuminate the kitchen area.
Moreover, because of their flexibility – users can also cut them and fit them for those extra tricky cabinet dimensions, making them one of the most versatile cabinet toe kick lighting options on the list.
It is one of the oldest tried and trusted options when it comes to toe kick lighting. These traditional lighting fixtures offer homeowners a very soft and continuous light that can help in creating a warm white illumination and welcoming kitchen environment.
These lights are oftentimes hidden behind a frosted-looking cover which aids it in delivering even light – while still remaining unobtrusive.
So, why should you install these lights in your kitchen? The answer is pretty simple – Not only will these lights aid in transforming your simple or ordinary-looking kitchen into a more fancy and extraordinary-looking area. But it will also help you create a warm and welcoming environment.
These lights won’t just save your kitchen as functioning lights but as an aesthetic enhancement that will highlight your kitchen’s features. Here are a few more examples.
A great thing about these lights is that they come with a few different features that allow the user to create a more personalized space for their kitchen area. These features can vary depending on the service provider and the type of toe kick lights you are using. However, here are a few common options that are available in these lights.
Toe kick lighting comes in a number of different options, which can be a good thing for those individuals who are all too familiar with these lighting fixtures – at the same time, a very tedious thing for those who are unfamiliar with them. If you, too are unfamiliar with these fixtures – here is a simplified version of what each light has to offer.
Both the directional rope light and the LED tape lights are good for homes that have a difficult-to-install interior design for their kitchen or prefer a more artistic approach. The LED tape-rope hybrid, on the other hand, is a good choice for those locations where a standard rope light or the more common low-voltage tape lights might not work.
Homeowners who might have specific needs can also consider using custom lengths for the wire or explore the additional power cable options – which can allow you to make tailored installations based on the area in which you want to install these lights.
Moreover, you can also explore strip tape lengths which can easily be found in your local dealer shop – providing you a helping hand for perfectly fitting the lights for your project.
The placement of these lights can play a critical role in getting the best results – since proper installation won’t only allow you to create the ideal environment for your kitchen but also aid in making it feel more comfy. Here are a few tips on how you can achieve that.
Underlighting is able to bring out the best of your kitchen. However, not every lighting fixture goes with every kitchen design – unless you know what you are doing. Here are a few more tips on how you can increase your kitchen’s aesthetic appeal.
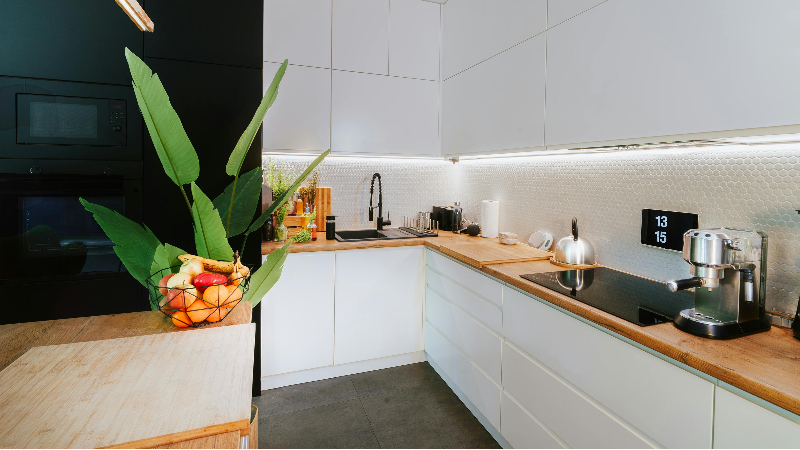
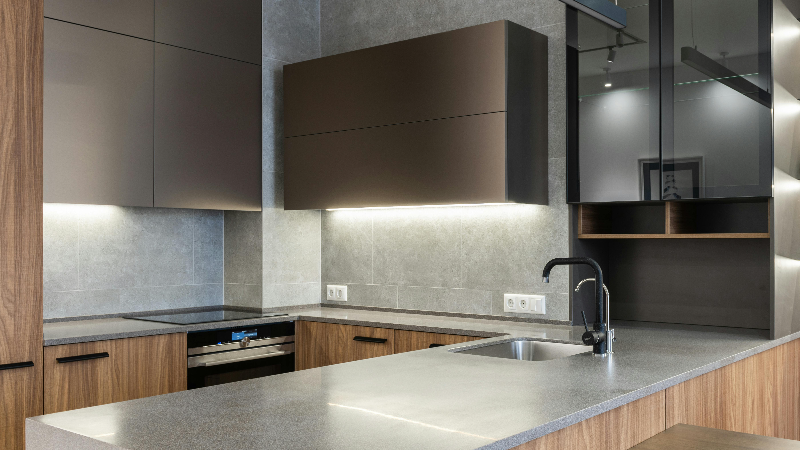
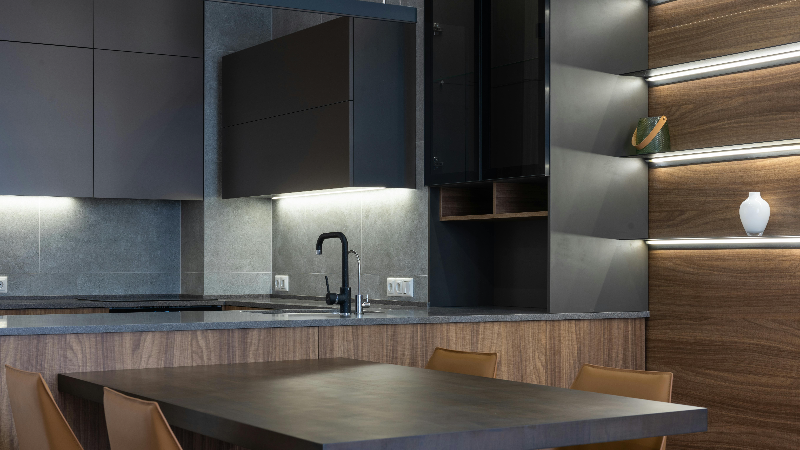
To get a modern aesthetic appeal – you can use these lights around your island and cabinet area. This will allow you to create a more sleek and modern look with the added bonus of increased distance in kitchen illumination.
Homeowners can also mix and match these lights to amplify the visual appeal more. This can be achieved by combining the under-cabinet LED lighting with toe kick solutions allowing you to create the ideal illumination while adding to the practicality.
In fact, you can explore our lineup of different LED lighting options to elevate your space and add an artistic touch to your kitchen space.
Installing the toe kick lighting in the kitchen is just one part of the process. Users who want to achieve the ideal lighting for their kitchen will need to go through a set of challenges. Here are a few of those.
As mentioned above, different toe kick lighting manufacturers provide different services – which can be really overwhelming for those who aren’t familiar with these lighting fixtures. However, this isn’t an issue anymore since you can visit our website and get the following benefits.
Homeowners who prefer to do their own handyman’s work will need to make sure that they are equipped with the proper tools – so that they don’t come across any issues while in the process of installing the lights. Here are the tools you will need.
Homeowners who are unsure about the writing or installation process should consider hiring a professional electrician – allowing them to avoid any unnecessary issues or getting into a life-threatening situation.
Absolutely – You will just need to make sure that there is enough space under your cabin – allowing you to have a much easier installation process.
For most kitchens, the ideal location for these lights is just below the cabinet edges or cabinet interiors where natural lighting can reach them and 2 to 3 inches above the floor – for better illumination.
Most people prefer warm white illumination to create an inviting atmosphere whereas for a more modern design cool white is much more preferable.
Absolutely, specialty when it comes to LED options since they are known for consuming less energy while also offering longer lifespans compared to normal lighting fixtures.
Homeowners who think that their kitchen is lacking can invest in toe kick lighting which will allow them to not just illuminate their kitchen area but also increase its functionality. However, it isn’t easy to find the ideal lighting solution – which is why you understand this guide properly and use it to increase your kitchen’s aesthetic appeal.
Are you still wondering if there’s a way you can make your kitchen even more atmospheric and engaging?
Well, the answer is yes – and you can do that by visiting Risun and checking out their toe-kick lighting solutions. Therefore, visit Risun Today and create your ideal living space with the help of their amazing products and handy solutions.
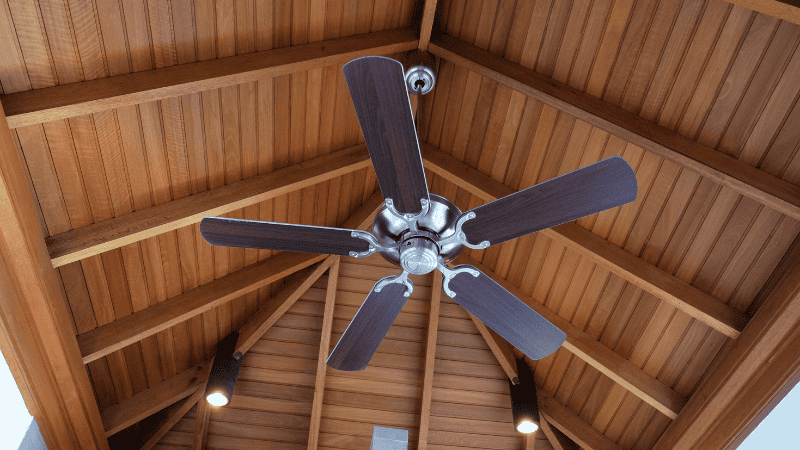
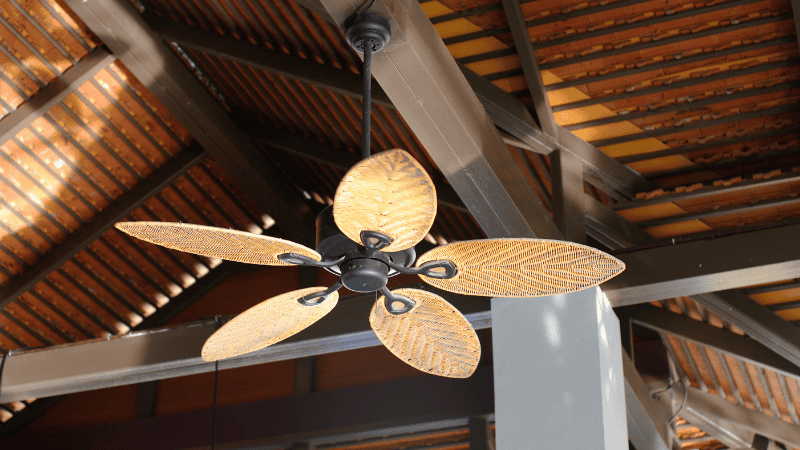
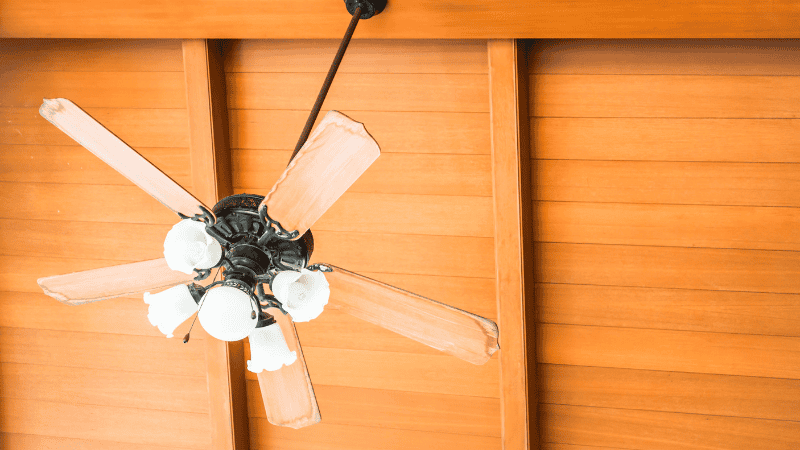
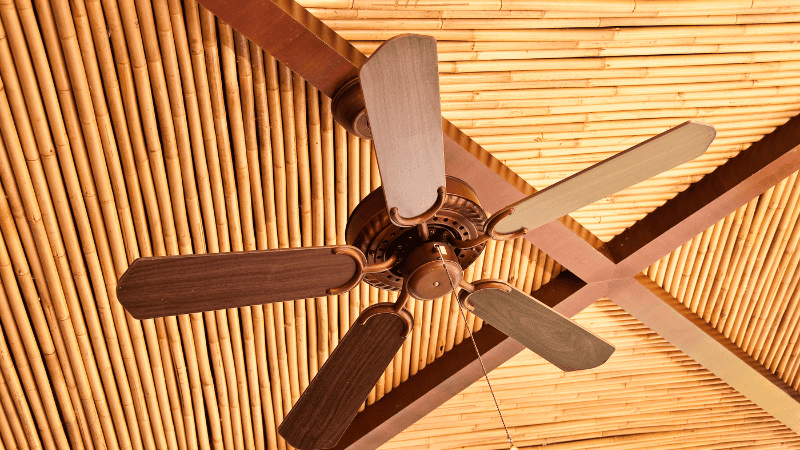
Does your house feel like a furnace in the summer, even after you have installed a fan? Believe it or not, research shows that depending on the direction you have installed your fan, it can impact the level of comfort you feel in your room.
Confused? Don’t worry, and continue reading. In this complete guide, we will show you the reason why the directions are important and how we can adjust them. It will save your money and still keep you feeling cool and comfortable during the summer days and the cool days.
The biggest reason why your fan direction matters is that it can help you improve the air circulation of your room, which is important for keeping it cool and comfortable even during the hottest day of the summer season.
Moreover, depending on the changes you are willing to make, you can reduce the energy your ceiling fan uses.
Proper fan direction in summer and spring can affect how air circulates in your room.
For instance, if you make your fan go anticlockwise, it will send the air downwards and allow you to keep your room cool, and this also removes hot spots as well as improves the temperature in the room, even if it’s scorching outside.
What will you get? An evenly circulated in every nook and corner of your room! Beat the summer heat by setting the fan in the right direction.
When the summer temperatures are soaring, you might want to turn on your AC, but with current energy costs, you’re worried about high energy bills. So what can you do?
Easy! After you have turned on your air con, you can either lower it or completely turn it off and use the ceiling fan in the room on a low setting. Allowing you to maintain the chilly environment while saving money.
By setting your fan in the right direction and temperature, your AC unit doesn’t have to work as hard. Consequently, you can reduce your energy consumption and enjoy fantastic cost savings!
Understanding air movement is key to effective cooling! It also keeps your appliances and cooling devices in the best condition. If you don’t set your ceiling fan right, it might overwork, and the fan motor can get hot.
This could cause a short circuit and burn the wiring. To prevent that from happening, you can place the fan in a way that it throws the warm air from your room outside and reduces the temperature.
With the reduced strain on your HVAC system, you can prolong its lifespan and save money on costly repairs.
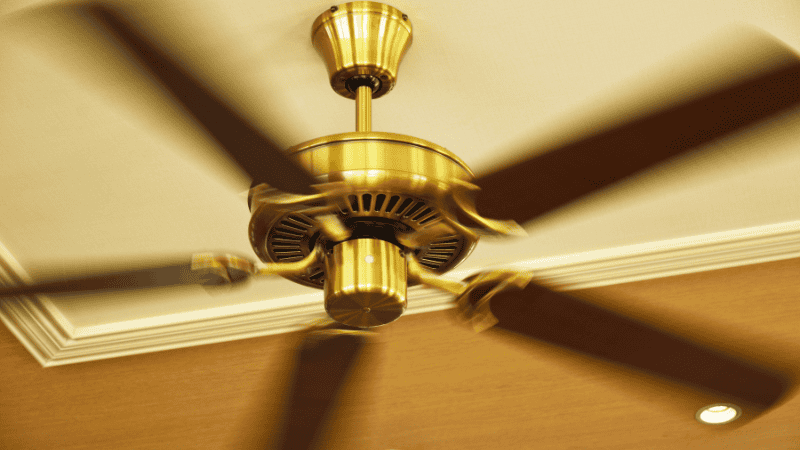
Setting your ceiling in an anticlockwise motion during summer can improve airflow and room ventilation. Wondering how?
It’s simple: the fan increases air velocity to create a ‘feels like cooling’ effect and ensures equal air distribution.
On the other hand, if you make it go counter-clockwise, it will start pushing the air downwards and reduce the number of warm spots in your room.
Also, you can even make your blower go clockwise during the cold days to pull the cold air from the room. Allowing you to maintain your comfort level no matter the season.
To get the most out of it while still maintaining your comfort, you will need to change the location as well as the direction of your fan, depending on the climate.
Why? Depending on the direction your fan is rotating, it can greatly impact the air in your room. Here are some fan direction recommendations to get the most out of your fans.
From May to August, make sure that your fan is rotating clockwise in the summer. This direction will allow you to push the air down so that it can create a wind-chill effect.
Moreover, the faster your fan spins, the quicker your room will cool down and remove the hot spots in the area, and the best part is, you won’t even need to lower your HVAC Unit.
During the winter season, you should set the direction of your air blower in the opposite direction, and that too at a low speed. It is because the fan will then effectively pull up the cold in an upward direction and gently redistribute the air throughout the room.
As a result, you’ll feel warmer without overusing your heating system. This will minimize energy usage and lower your carbon footprint
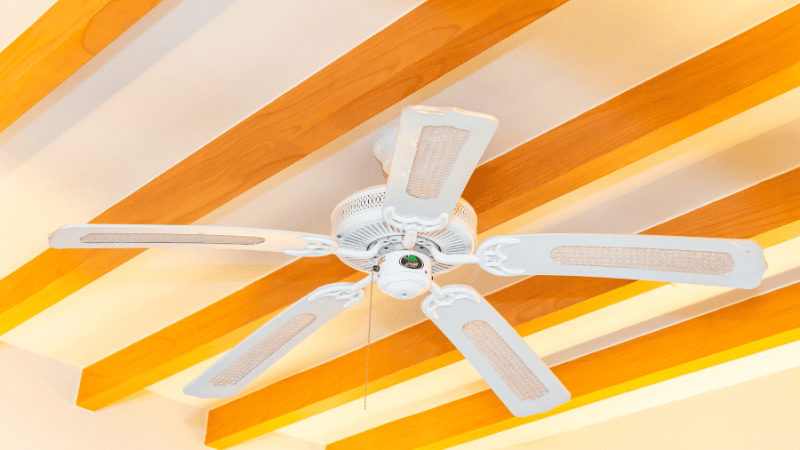
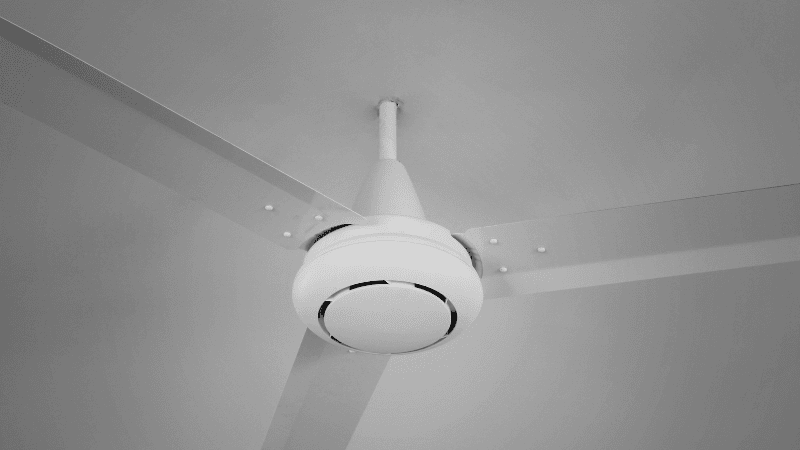
Individuals who might be having a difficult time changing their fan direction can install a smart fan that comes with a reverse switch.
It will allow you to easily switch the direction of your fan without requiring you to do any additional work. All you need to do is press the small switch on the motor housing and change the direction of your fan movement.
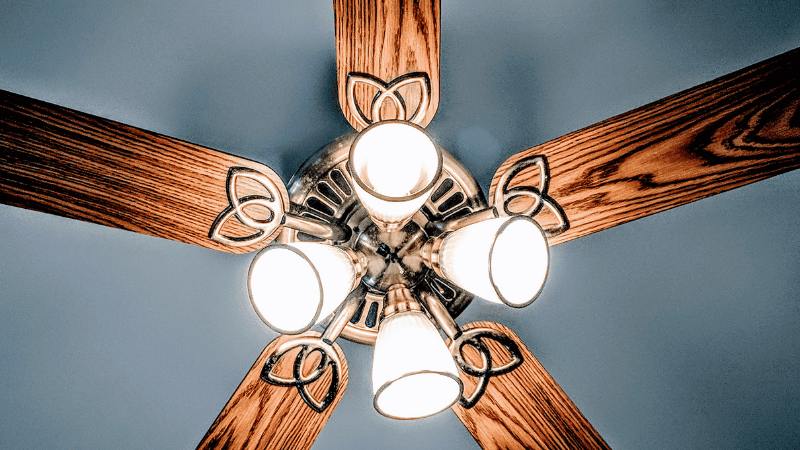
On the other hand, if you have a traditional fan and don’t mind a little bit of work, you can switch the blades on it and install them in the opposite direction, which will have the same effect.

Knowing which direction your fan should rotate is one thing, but knowing how to do it is another issue. Want to know how? It’s quite simple. You just need to follow these simple steps.
Let’s start slowly by making sure that you have switched off your fan beforehand. Why? So that it can cool down and prevent you from burning your hand.
Before you start deconstructing your fan, see if you can find a small switch on the fan. You can even find them near the light fixture. This button controls the direction of the blade and sets it in clock and counterclockwise movement.
If you do find a switch, press or slide it in the other direction. Whereas if you don’t find the switch, you will need to change the position of your blades.
Click the button to turn your fan back on and check whether the airflow is directed downwards. If cool air hits your face, you’ve set it correctly for the summer season!
Depending on the type of installation you have done, you might also have a speed setting. Use it to increase the cooling in your room. Remember, the higher the speed setting, the better comfort you’ll enjoy during the stifling hot summer days.
The correct ceiling fan rotation can result in several practical benefits, including:
After you have made your ceiling fan go anti-clockwise, it will take all the hot air from your room and bring in the cold air from the outside, creating a wind-chill effect and providing you with comfort.
Moreover, this simple technique will keep your room cool even if your HVAC thermostat is set at a higher temperature.
Using your ceiling fan correctly means your air conditioner doesn’t have to run as long, helping you save on electricity bills during the summer. In fact, higher speeds can result in a 76% reduction in energy use, lowering your energy usage significantly.
Since you will be able to keep your room chill with just your fan, it will aid in reducing the need for your air-con, leading to lower energy consumption. Which in turn will allow you to create a smaller carbon footprint and improve the environment around you.
Depending on how effectively you use your ceiling fan, you can distribute air in a way that will allow you to keep the area cool. Here are a few ways you can use the air blower at optimum levels.
You should never use the AC unit alone during hot summers. It is because you have to set the thermostat at a lower temperature, which will consume more electricity. The best way to approach this issue is by using your fan alongside your AC unit.
This allows you to draw in the cool breeze from the AC unit and spread it evenly throughout the room. It will effectively maintain the coolness of the space even when the thermostat is at a high level.
In summer, you should set your fan at the top speed so it can quickly blow the warm air out and push down the cool air in the room. This will also bring down the indoor damping levels and mitigate that sticky, sweaty feel.
Modern smart ceiling fans can adjust speed and direction automatically, making it easier to optimize performance. This means you don’t need to manually regulate speed and direction.
An Energy Star-certified fan consumes 60% less energy compared to non-certified, standard models.
Due to microscopic dust particles in the air, your fan gets dirty. These particles get stuck on the blades and duct of the fan, which lowers its performance and efficiency.
By cleaning the fan blades regularly, you prevent this buildup, allowing your cooling system to operate at its full potential and ensuring better performance and energy efficiency.
Additionally, keeping the fan blades clean helps prolong the lifespan of the fan and reduces the risk of mechanical failures.
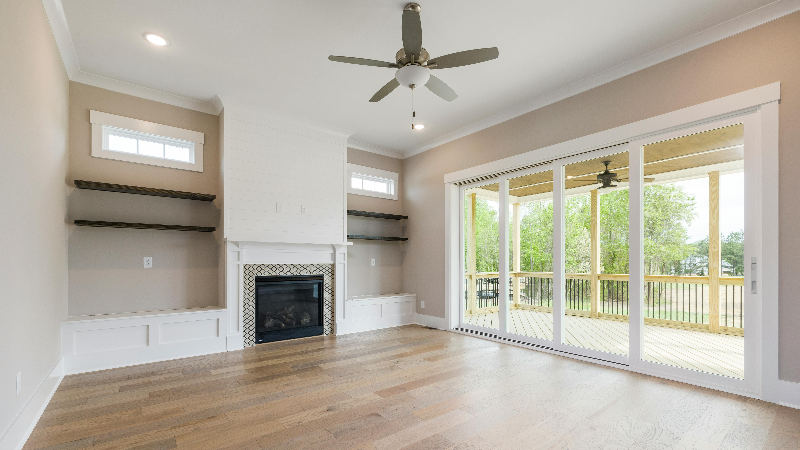
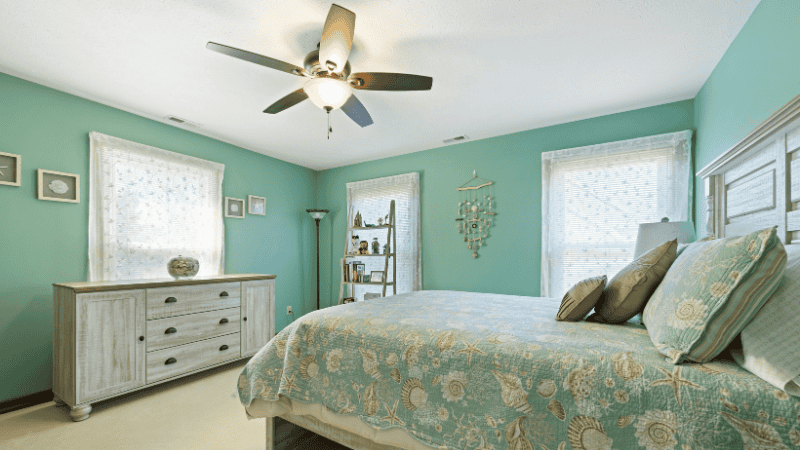
The productivity of a ceiling fan depends highly on the direction it is rotating, which should be determined according to the room’s purpose and layout. Why is that? Because the right direction will make sure that air is spreading appropriately, allowing you to create a comforting environment.
Here’s how to reap the full benefits of ceiling fans by modifying their direction depending on the room they are in.
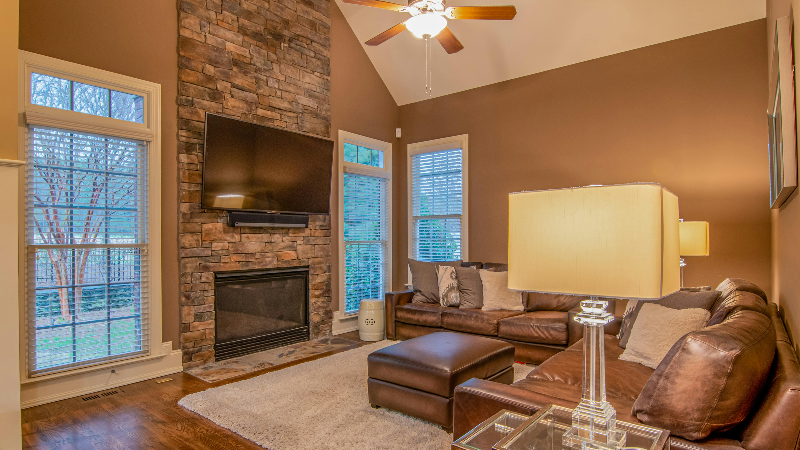
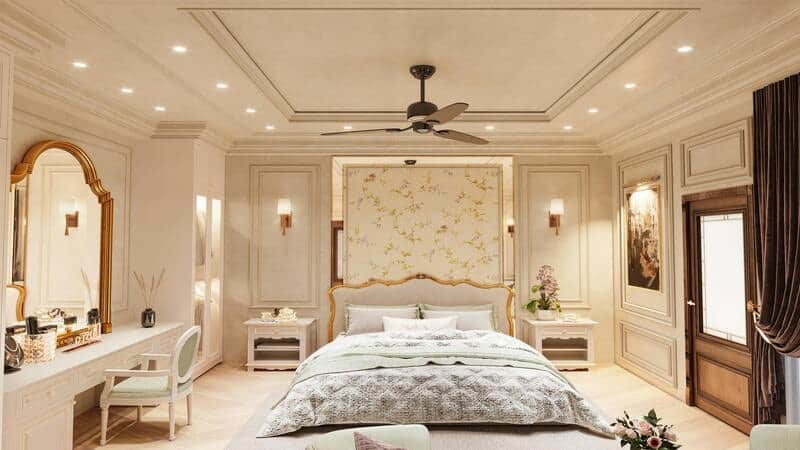
For rooms that might have high ceilings, individuals can make their fans go clockwise at a lower speed. This will allow them to bring the warm air from the ceiling down below, allowing you to keep the room cozy without requiring a heating system.
A gentle breeze can elevate dining experiences. During summer, make your fan go counterclockwise. This will allow you to bring in light and refreshing air in the dining area, providing you with the maximum amount of comfort.
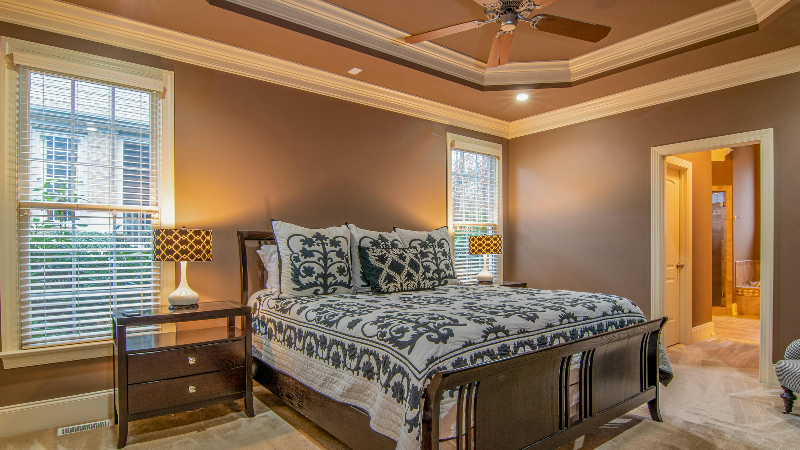
Depending on how much you use your living room, it can cause it to have an uneven dispersal of temperature.
You can fix that by making your ceiling fan go counter-clockwise during winter to distribute the warm air evenly in the room, whereas you can use the same direction in the summer to distribute the cold air evenly.
To make sure that you have an undisturbed sleep, you can make your room fan go counter-clockwise in summer to get a cooling breeze, whereas in winter, you can make it go clockwise to get the warm air from the ceiling.
Even though you can’t replace your air-con with your ceiling fan, especially if you want to reduce the temperature at a much greater rate.
However, if you do use your air blower effectively, you can minimize the usage of your air conditioner and keep yourself cool even if it’s scorching outside.
By using an air blower with your air con, you will be able to evenly spread the air around your room, allowing you to remove any hotspots and create an overall comforting zone.
Moreover, this adjustment might lead to potentially high savings on energy bills while also reducing the pressure on your AC unit, which extends its lifespan.
On days when the temperature is tender and the heat isn’t unbearable, a ceiling fan could be your go-to cooling solution.
Fans produce a gentle breeze that promotes air movement, making the room feel several degrees cooler without actually lowering the temperature. This effect is ideal for early mornings, evenings, or during transitional seasons.
When the mercury rises and outdoor temperatures become unbearable, ceiling fans alone may not provide adequate relief. Air conditioners are indispensable for bringing down the actual temperature in such conditions.
If you use ceiling fans in the wrong way, it will reduce their effectiveness and make the indoor area more uncomfortable. From setting the fan in the wrong direction to incorrect speed, these little mistakes can cause significant energy inefficiencies and poor comfort levels.
Here, we will discuss three common pitfalls you should avoid when using ceiling fans.
One common mistake many people make is running the fan in the wrong direction, which can severely affect the airflow and overall cooling efficiency.
This is why you will have to make sure that your fan is rotating counterclockwise in summer. This direction pushes air downwards and keeps you cool even if the indoor temperature hasn’t changed.
Moreover, running it in the wrong direction could lead to inefficient airflow and increase energy consumption.
If you set a fan on low, it will not be able to produce enough air circulation. Cursing your room to remain hot and stuffy. On the other hand, using the fan on the highest setting might lead to too much airflow, especially in smaller rooms.
This can make the air feel choppy and, in some cases, cause discomfort. It’s essential to find a balance. A higher setting can be helpful in larger rooms, but in smaller spaces, a moderate setting will ensure comfortable air circulation without creating an overwhelming breeze.
What a lot of people don’t know is that fans require proper ventilation. Why? Because without it, air becomes stagnant, causing the fan to reuse the same warm air over and over again and failing to get the room cool.
To maximize the cooling effect, ensure that windows or doors are open to allow the air to circulate.
Doing this will create a cross-breeze that helps in cooling the space naturally, heightening the fan’s capability of circulating fresh air and maintaining a comfortable temperature.
Here are some handy tips that will allow you to make the most out of your ceiling fan, depending on the location you are using it. Plus, this way, you can control your energy bills and reduce your carbon footprint for a greener tomorrow.
By using the right techniques, you can use your ceiling fan effectively and create a cool and comforting environment without requiring the help of your AC unit.
You just have to make sure that it is rotating in the right direction and is clean. Plus, this practice will also help you reduce your energy bill.
Now that you know how a ceiling fan can enhance indoor comfort, all you need is the perfect fan for a cooler, more organized home this summer! Retailers like Risun offer high-quality products and services to improve home comfort.
Contact us now to find the ideal fan for your home and enjoy a refreshing, cool summer!
Yes, rotating counterclockwise is best for producing the cool air you need in summer. It will create a downward airflow for a wind-chill effect. This will keep you cool even on the hottest days without actually lowering the temperature.
It depends on the season. But to determine if the fan is set in the right direction, stand underneath while it’s on. To remove heat, the air direction should be downwards, while for cozy wintertime, the airflow should be upwards.
Absolutely! Ceiling fans are there to help cool the air and reduce the load on your air conditioner, which lowers usage and the cost of energy.
If your fan doesn’t have a reverse switch, you will need to remove the blades of your fan and adjust them accordingly.
Do you want to make your kitchen more modern and fashionable? A chandelier might just be the perfect pick for you.
Perhaps you don’t have the correct information when investing in a kitchen chandelier and are troubled by how to install and choose it.
This guide will solve your problem and let you know how to learn about chandeliers, how to choose, and so on. At the same time, we will provide you with sufficient information to meet your needs.
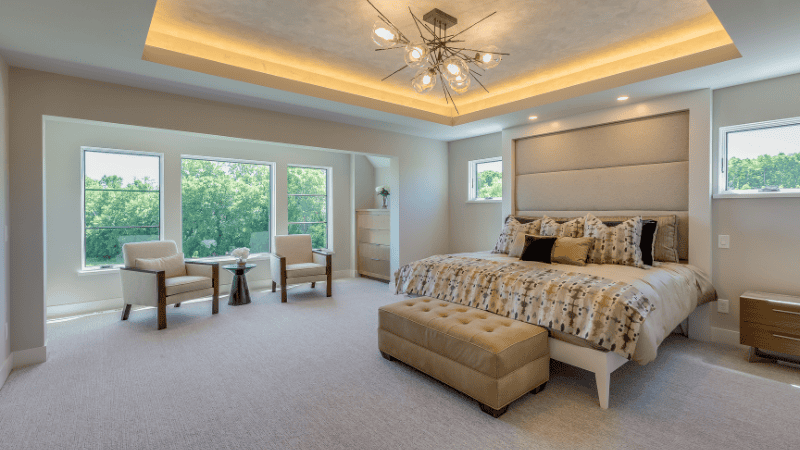
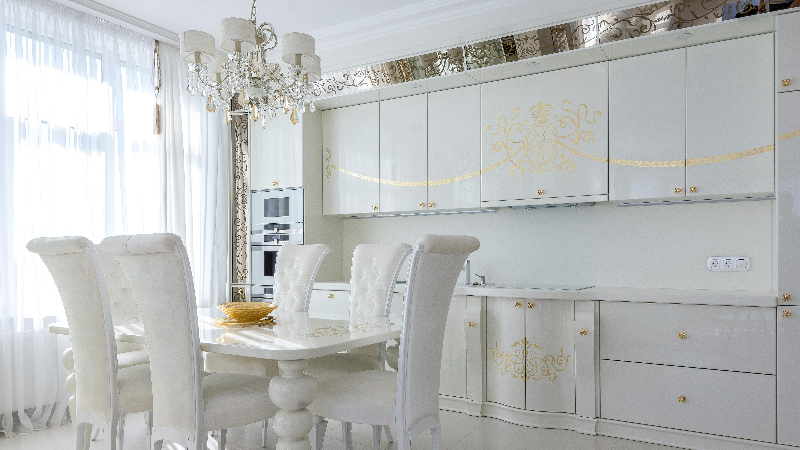
For those homeowners who are unaware, a chandelier is more than just an ornament hanging on the kitchen ceiling like a ceiling fan. It can add a whole lot of elegance and even sophistication to the kitchen space while at the same time creating a warm and welcoming environment.
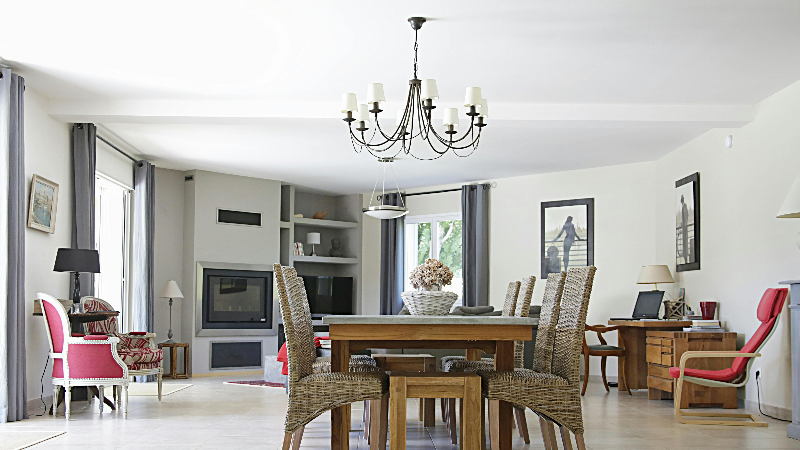
But that’s not all, it can also act as a focal point for the room, by drawing the attention of the individuals who are having a meal. Plus, with the right selection and choice of location. A chandelier can create an environment that gives a sense of luxury and a boost in appeal.
One more reason why these chandeliers are so appealing is that they come in a number of styles that can range from anywhere from a traditional look to a more modern appeal all based on the taste of the homeowner.
What this all means is that before investing in a chandelier, make sure that you understand the overall aesthetic of your kitchen as well as the kitchen’s appeal you are leaning towards – is it a minimalistic and approachable look or a more classic charm?
As mentioned, chandeliers aren’t just glorified ceiling fans. They provide homeowners with a number of benefits that can greatly affect the way their kitchen feels. Here are a few simple examples.
Outside of making the kitchen feel more luxurious and the added bonus of elegance – it is able to transform an ordinary-looking room into a space filled with lighting that is both warm and inviting. Allowing homeowners to create an atmosphere that tenfold the enjoyment of a family meal.
Visual appeal isn’t the only functionality these chandeliers provide. Since these fixtures are available in a number of different sizes and styles, plus the materials they are made from. It allows homeowners to find a fixture that is more suitable for their kitchen environment.
For instance, owners with a dimly lit kitchen can install chandeliers that provide better lighting, helping to illuminate the work area while also enhancing the overall ambience of the room.
When it comes to choosing the right chandelier for your kitchen, there are plenty of styles to match different tastes and needs. From elegant to modern to something a bit more unique, each type brings its own charm to the space.
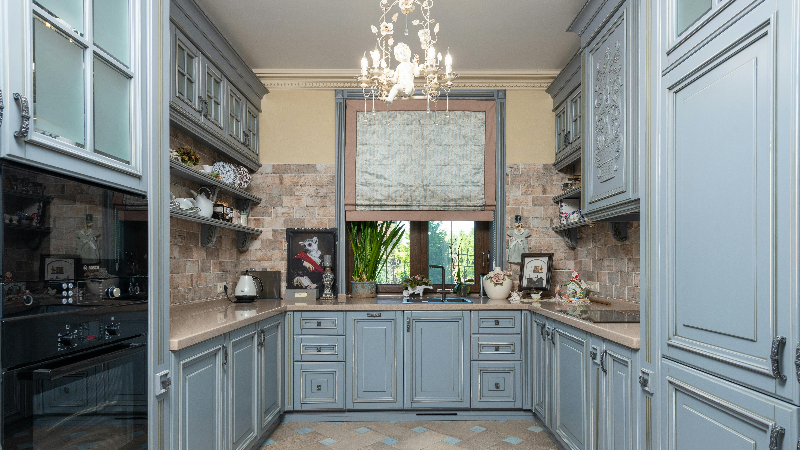
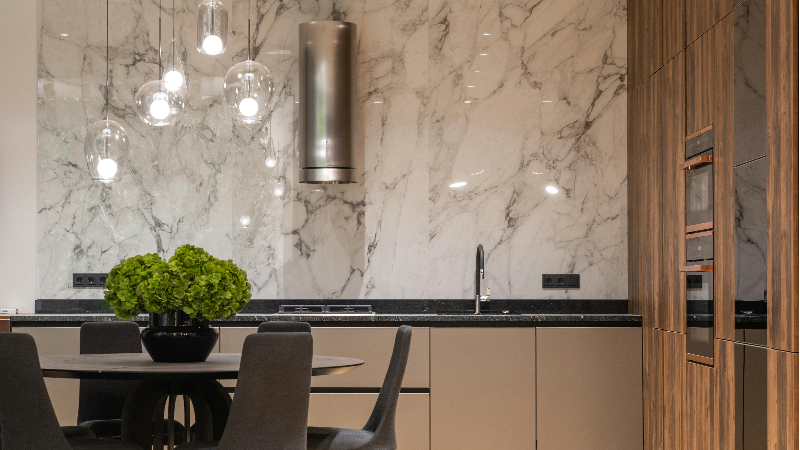
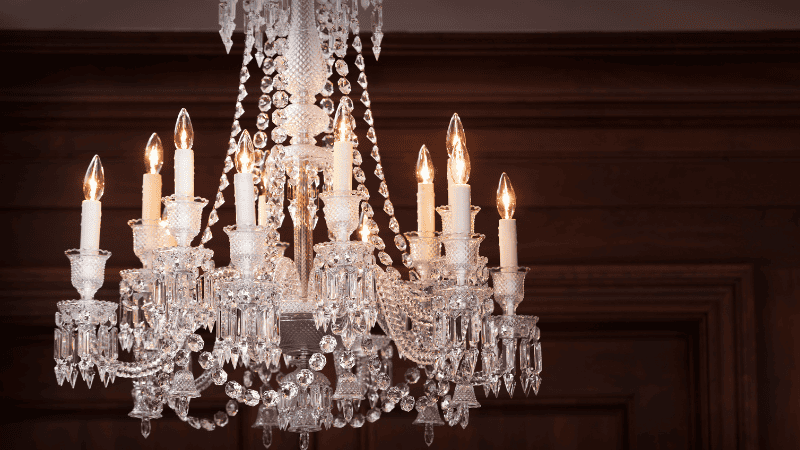
Crystal chandeliers are a favorite for adding a touch of luxury. They catch the light beautifully and instantly make the kitchen feel more upscale and refined.
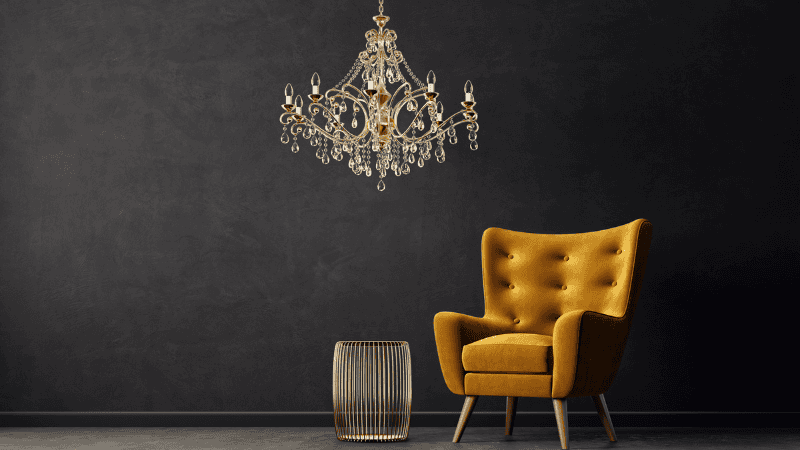
Modern chandeliers are all about clean lines and simplicity. They’re perfect for creating an open and airy look, especially when paired with LED lighting that helps save energy while still looking stylish.
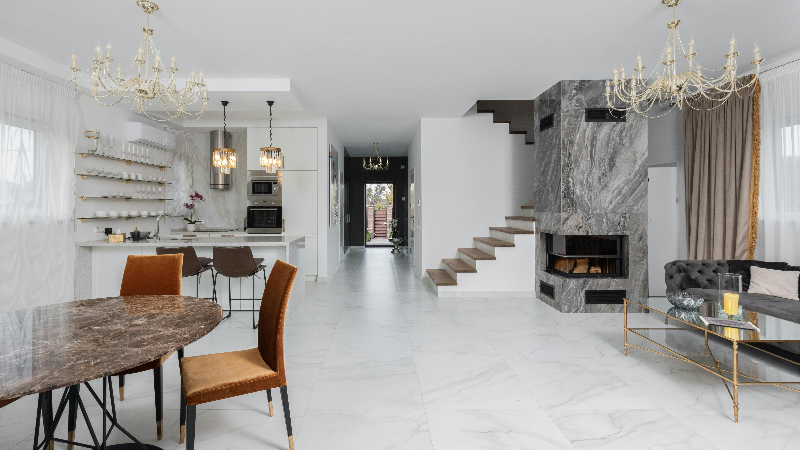
For something more classic, traditional chandeliers offer a warm and inviting feel. Their detailed designs often bring a sense of nostalgia and help create a cozy atmosphere in the kitchen.
Linear chandeliers are a great choice for lighting up kitchen islands or peninsulas. Their long, narrow shape helps spread light evenly while keeping the design sleek and polished.
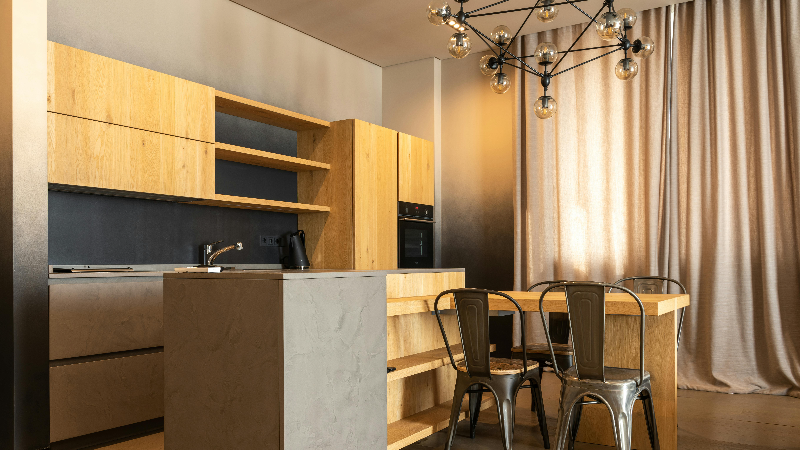
If you want to add a bit of personality, pendant-style chandeliers are a fun option. They come in a variety of shapes and sizes, making it easy to create a unique and eye-catching look.
| Type of Chandelier | Description | Ideal Location |
|---|---|---|
| Crystal Chandelier | Elegant design with intricate details that can catch light beautifully. | Traditional and luxurious kitchens. |
| Modern Chandelier | Sleek lines with a minimalist design, often using LED lighting for energy efficiency. | Contemporary kitchens. |
| Traditional Chandelier | Warmth and nostalgia through detailed designs. | Classic or vintage-style kitchens. |
| Linear Chandelier | Long design, perfect for kitchen islands or peninsulas. | Open spaces and islands |
| Pendant Chandelier | A whimsical design that is available in various shapes and sizes. | Small kitchens or unique decor themes. |
To get the most out of a kitchen chandelier, homeowners must position it in a place that not only increases the functionality of the kitchen but also impacts the visual appeal. Here are a few helpful suggestions.
Homeowners who want to create a more dynamic focal point can install their chandeliers above the kitchen island. This will allow the fixture to deliver better lighting for food preparation, while also opening opportunities for socializing when there are guests in the house.
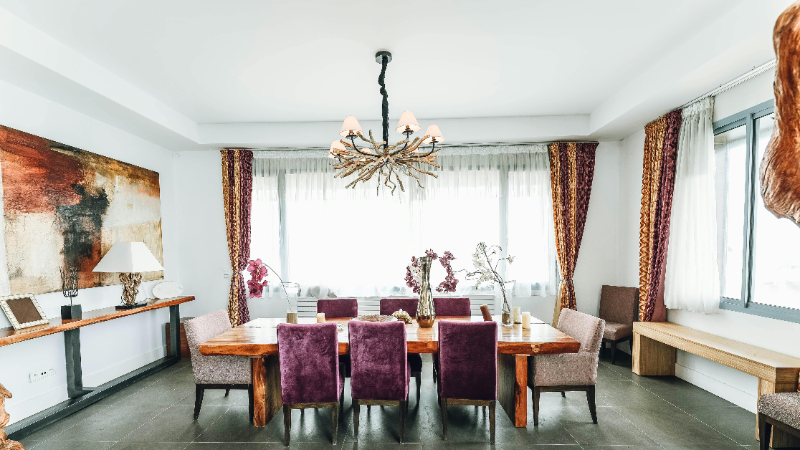
Owners who use their kitchen as an eat-in area can position their chandelier right in the center and above the dining table, allowing them to create an ambiance during meals while creating an inviting atmosphere.
Homes that have large kitchens or big open spaces that have high ceilings can use chandeliers to create a visual balance in the room. A well-placed chandelier can also serve as a central lighting source while also complementing the room design.
If you are placing it above the kitchen island, make sure that its bottom is about 30 to 36 inches above its countertop, because this will allow you to make sure that enough light is being spread to illuminate the area without creating any dark areas.
Whereas if it’s being installed above the kitchen table, it is best that it is hung about 28 to 34 inches above the table. This height will allow for a more comfortable dining experience without becoming a hindrance to the kitchen style or its light quality.
Also, if you have a very high ceiling, make sure that you choose a large chandelier that can fill the space perfectly without overwhelming the room.
Like height, spacing also plays a crucial role in making sure that your chandelier stays effective without causing any issues.
This is why it is important for owners who are investing in multiple chandeliers to space them evenly to maintain balance in the area. This applies to all chandeliers, no matter what size they are.

After finding the ideal position and spacing, if you are installing the chandelier by yourself, make sure that the fixture is installed properly.
On the other hand, while there is no issue in installing a chandelier by yourself it is advised that you use the help of an expert for a better and accident-free installation process.
The space where the chandelier will be installed also plays a major role in creating harmony between the visual appeal of the kitchen and its functionality.
The best way to get the most out of this is by measuring the dimensions of the kitchen as well as the spot where you will be handling the fixture.
Also, as mentioned above, it is a general rule of thumb that owners make sure that their fixture is hanging 30 to 35 inches above the dining table at any other location.
At the same time, make sure that it is proportional to the room size. For instance, if the kitchen is 10 feet by 12 feet, the dimension you get is 22 inches, which can be used as a guideline for selecting the right size fixture.
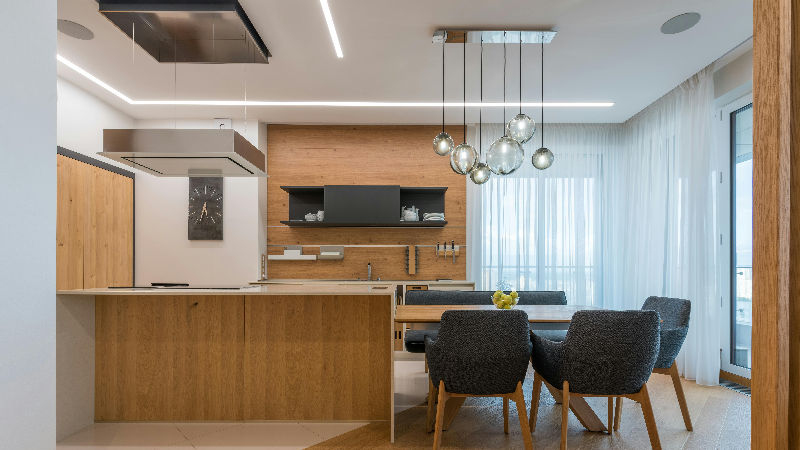
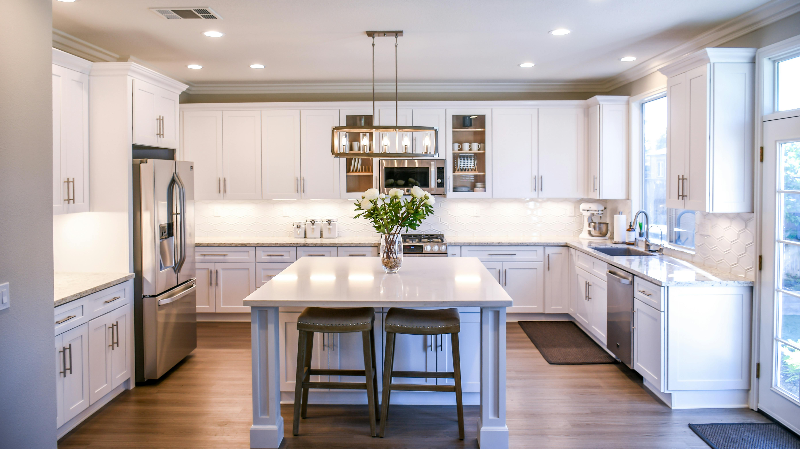
Homeowners with a modern kitchen can highly benefit from a sleek chandelier that has clean lines and works with LED lighting, creating an energy-efficient environment.
This, together with the fact that they offer owners a minimalistic design that can seamlessly blend into the décor of the room while delivering ample amounts of light.
The best example of this kind of chandelier would be the crystal-clear chandelier, which is a top pick for its design that doesn’t overwhelm the minimalist aesthetic.
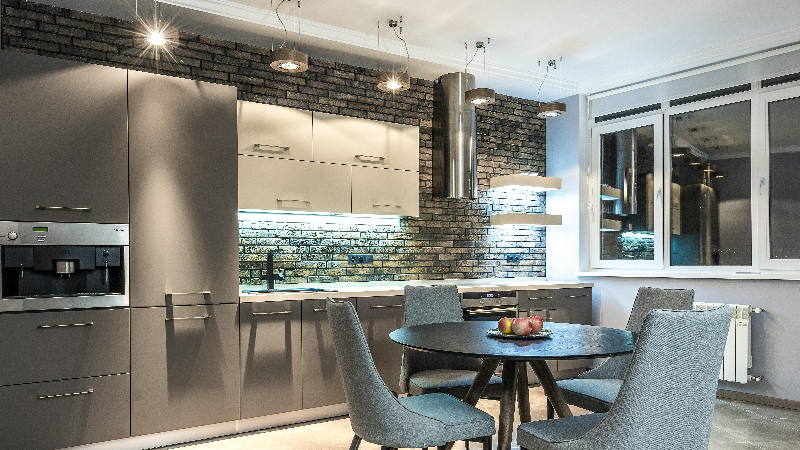
Rustic kitchens by design bring warmth to the kitchen atmosphere. This is achieved by the materials used in its design, like wood or metal, which means that chandeliers made from the same materials can only fit perfectly with this framework.
A wooden chandelier that houses exposed bulbs can create an inviting atmosphere, allowing the owners to create a farmhouse charm while delivering pleasing light on the dinner table.
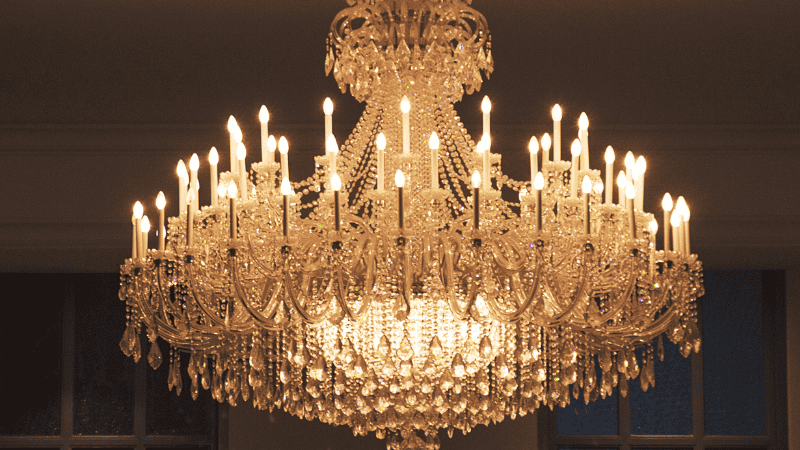
Rooms with high ceilings will need to install larger-scale chandeliers for a better and more dynamic focal point, allowing them to fill the space effectively.
You can also go for the multi-tiered crystal chandeliers, which allow the homeowners to make a bold statement that draws attention to the room while illuminating the area beautifully.
For a small kitchen, a compact design is ideal. Not only do they provide style without overwhelming the space, but they also increase the aesthetic appeal of your area.
Owners can go for mini chandeliers or pendant lights, since these are able to provide the ideal lighting without being overbearing.
You know about chandeliers is one thing, but choosing the ideal chandelier is another. Before investing in a kitchen chandelier, you need to make sure to keep the following steps in mind.
Firstly, measure your kitchen and the area where you plan to hang the chandelier. Make sure the chandelier is the right size for the room and matches the ceiling height to keep everything in proportion.
Homeowners who plan to install a chandelier on their own can use the chandelier size formula to find the right fit. Simply add the room’s length and width in feet. The total will give you the ideal chandelier diameter in inches.
Secondly, you should search for a chandelier that complements the existing décor, whether it leans toward a modern aesthetic or a more traditional look. Selecting a design that works well with the overall style of your kitchen can add to its visual appeal.
And lastly, check how much light is needed for the area. If you’re unsure or have different lighting needs depending on the situation, you can consider choosing a chandelier with a dimmer. This feature lets you easily adjust the brightness and create different moods as needed.
While there are many different chandeliers available on the market, crystal chandeliers are the most popular choice among them. At the same time, they are also the most tricky ones to select. Here are a few handy tips for choosing the perfect crystal chandelier.
The dining room also plays a crucial role in the visual appeal of the kitchen. After finalizing the chandelier the next step is to install the lighting for the chandelier. Here are a few suggestions.
Individuals who prefer to do their own handiwork will have to make sure that they are following the right guidelines and are taking precautions. Here are a few precautions that are needed before installing a chandelier.
You want to make your kitchen stand out can opt for a chandelier since it will not only enhance your kitchen atmosphere but also improve its functionality.
However, you should know that finding and installing your ideal chandelier is not easy, especially with so many options available. So, I hope this guide helps you learn how to identify and find good crystal chandeliers.
After you have installed your ideal chandelier, why not make your space even more atmospheric? With the help of Risun and our high-quality products and lighting solutions, you can transform your home into the perfect living space.
Contact us today and get professional suggestions to solve your problem and save your time, importantly, start creating the atmosphere you’ve always wanted!
Homeowners with low ceilings can choose flush mounts or pendant light chandeliers, allowing them to avoid the issues that come with low-hanging fixtures.
You will just need to make sure that it is installed correctly and has the proper height adjustment for the kitchen island.
The price of each chandelier can vary depending on many factors such as size, design, materials, and more. This is why it is important to have a budget in mind before investing in a chandelier.
If you have a large kitchen with a high ceiling, you can opt for a pendant-style chandelier, which allows users to strike a balance between functionality and better illumination. Also, make sure the lighting fixtures are spaced properly to further enhance the visual aesthetic of the kitchen.
Ready to get started ?
Send Your Inquiry
Our team will get back to you promptly
please
download
Get notified about new products
Our team will get back to you promptly!